Images
Images are quite easy to add in this Creator, and we'll be going through how to insert them.
Tip
It is advisable that you do not upload images until the core mechanics of the CYOA are complete. The vast majority of space that an Interactive CYOA takes up is due to images, and a huge amount of images will slow down lower end PCs. CYOAs over 300 MB are known to have caused issues such as crashes.
Adding Images
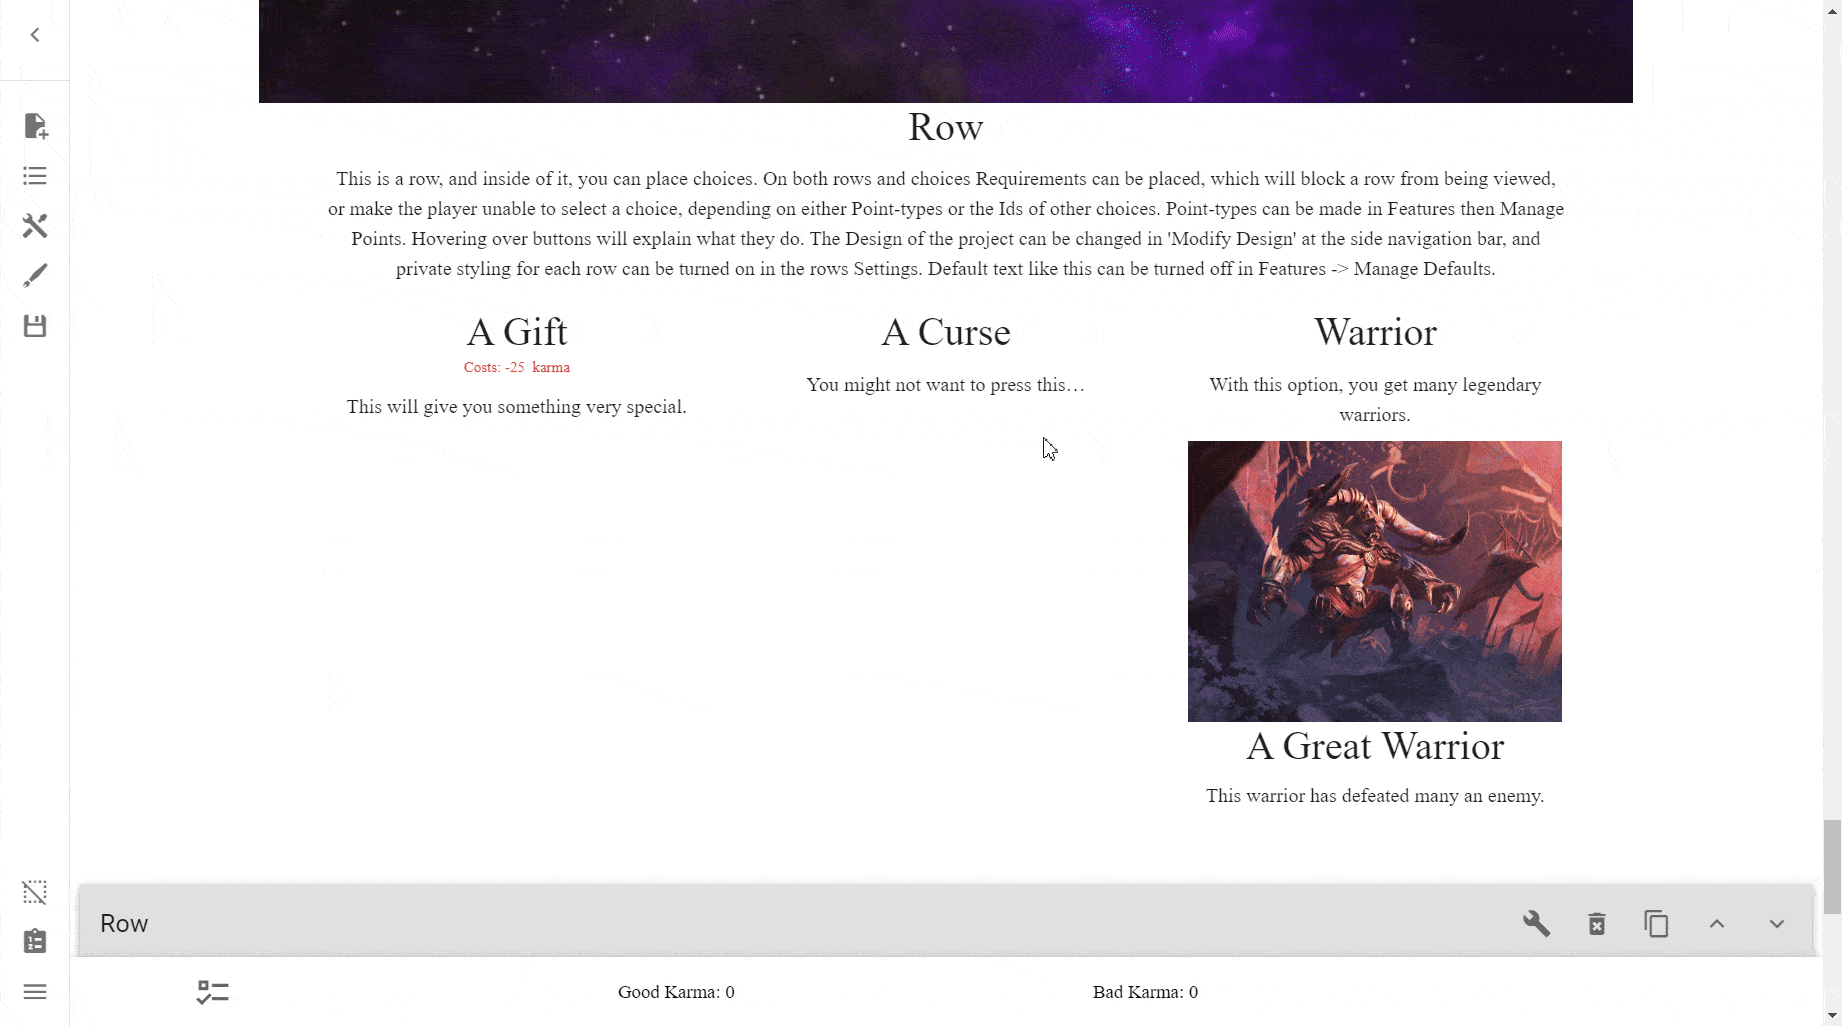
To add an image to any compatible object, simply press the Change Image button.
Don't worry about the Image Upload menu for now, we'll get into that later.
The specifics for each compatible object and examples are detailed below.
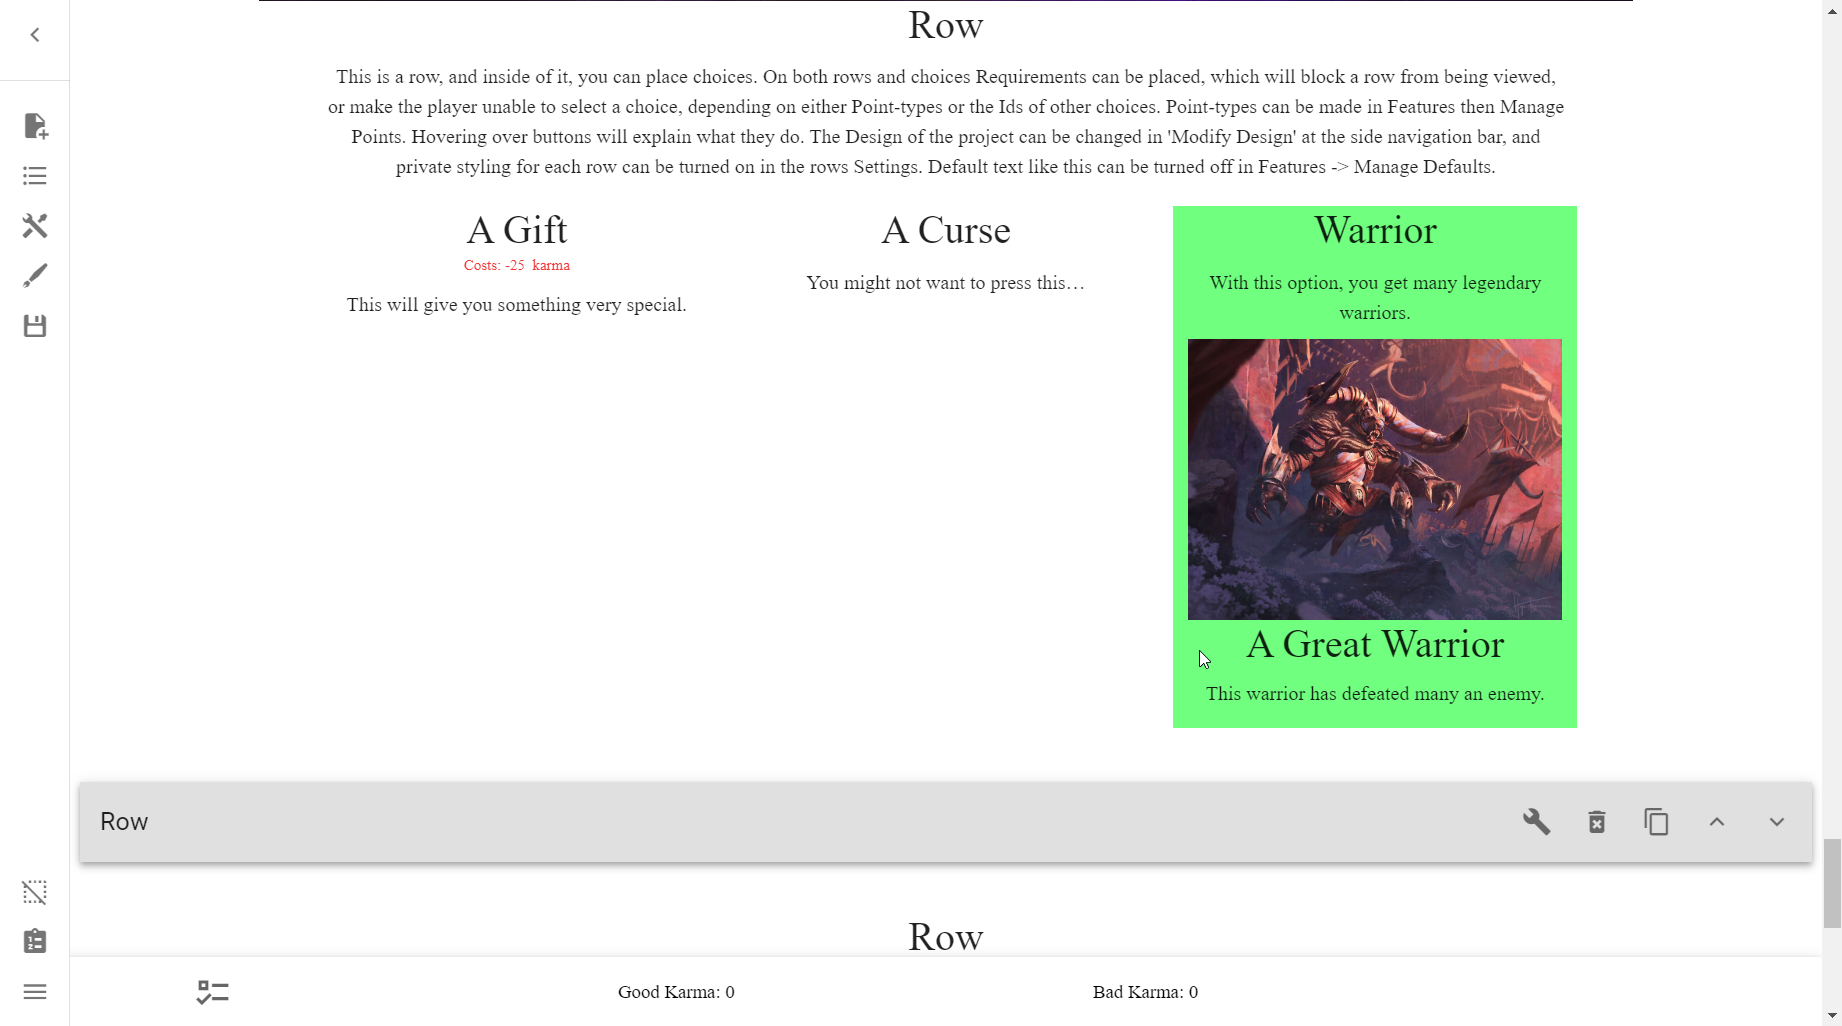
Adding to Rows


Adding to Choices


(TODO) Adding to Choices via Player Action
Players can upload their own images to a Choice if a Choice has that option enabled. This can be useful in situations where you want a player to:
- Upload their looks, costume, appearance, etc
- Upload the looks of another character, such as a custom character they've created
And so on.
Adding to Addons
(TODO LINK) Adding to Backgrounds
Adding images to the Background, Row Backgrounds, and Object Backgrounds is covered in the Styling section.
Removing Images
To remove images, simply press the Remove Photo button.
Warning
The creator does not warn you when removing photos, so remain cautious around the button.

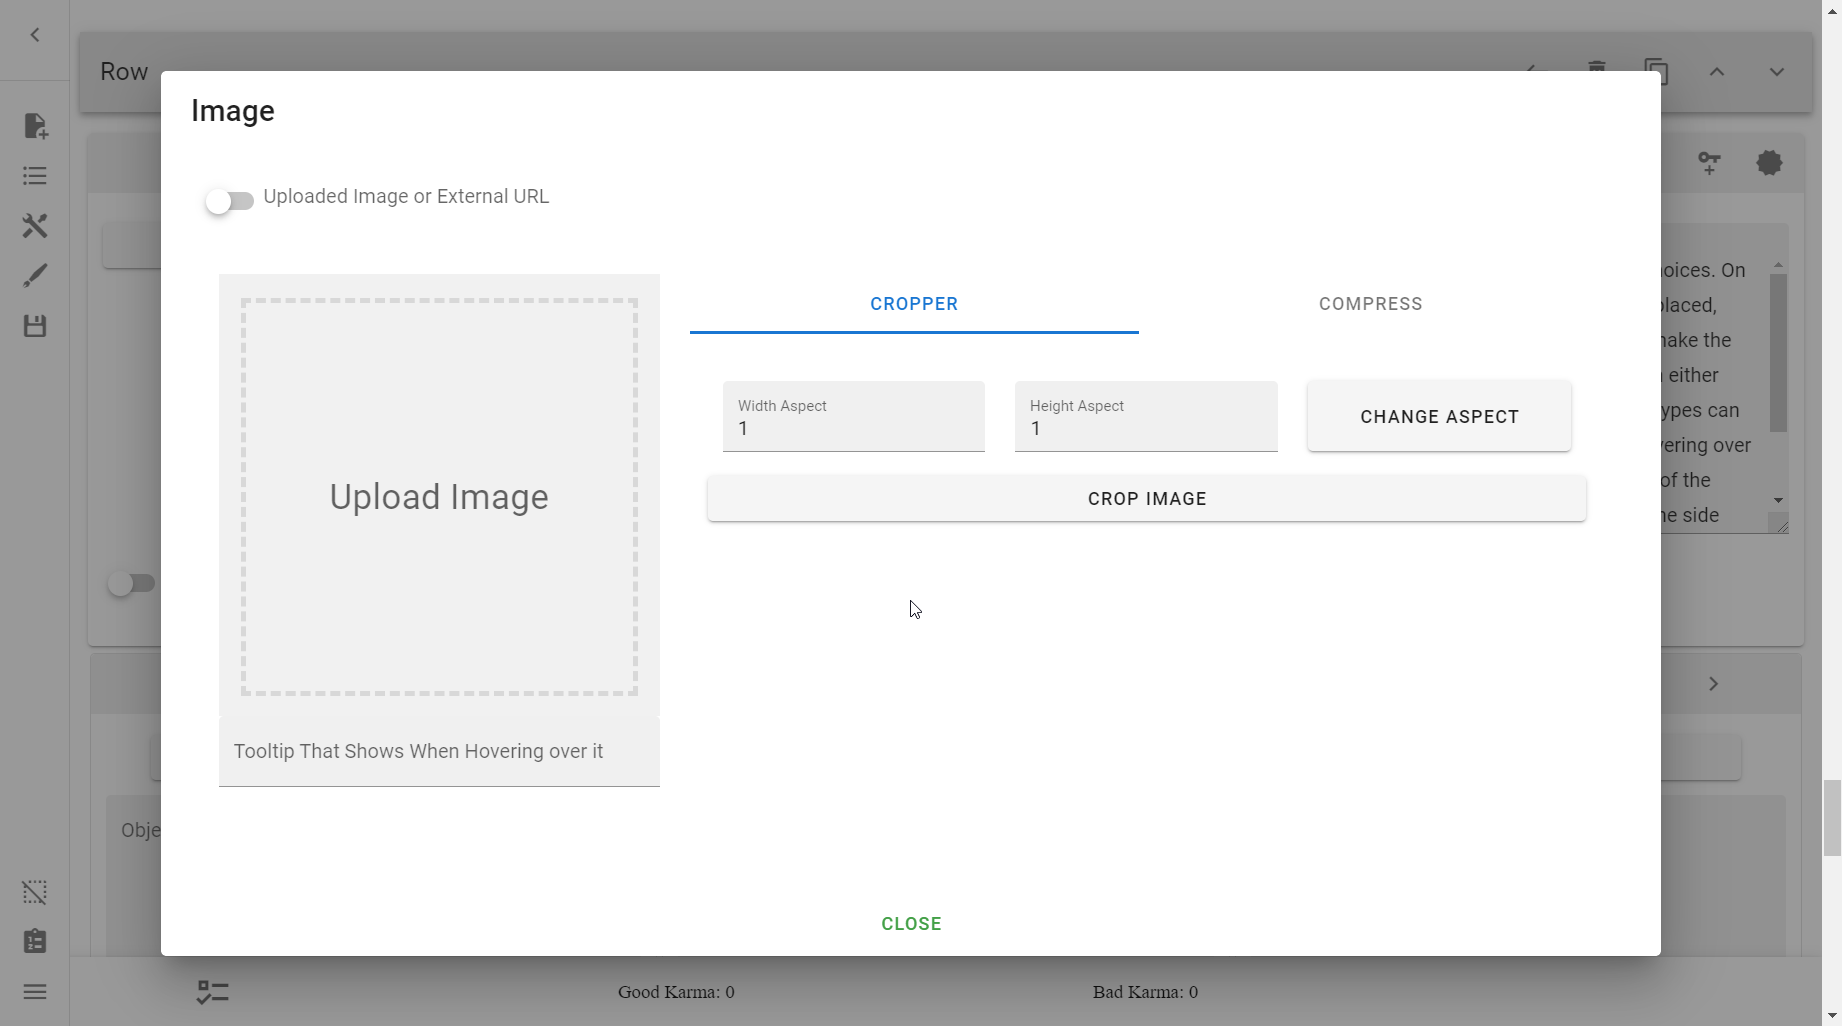
The Image Menu
This is the Image menu. It is where you will upload your images and assign them to Rows, Choices, Addons, and so on.
Uploaded Image or External URL
This switch allows you to switch between uploading the image yourself (directly into the .json file) or using one already on the internet.
Why you would want to use one or the other is covered later here.

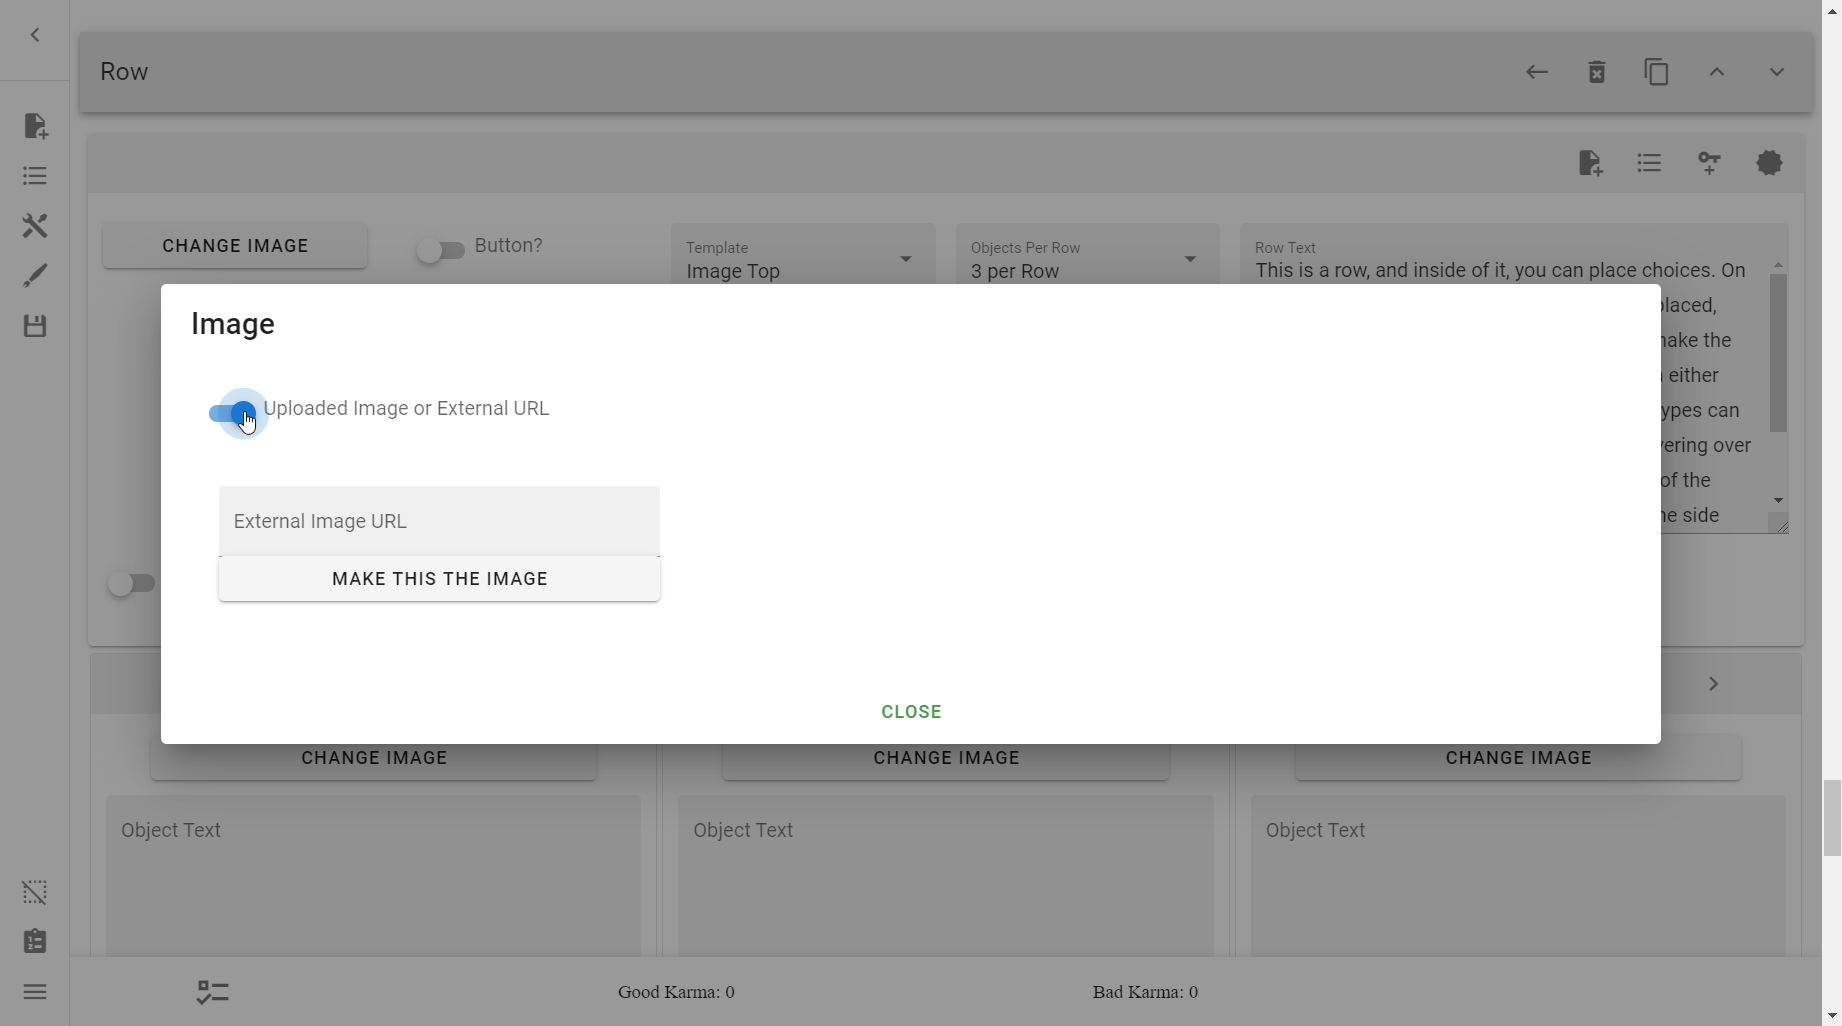
External Image URL
This only shows when the above switch is switched on. Put the URL of the external image that you wanted to show here.
Note
Unlike uploaded "local" images, external images cannot be altered. This means they cannot be cropped, compressed, nor have a tooltip.
Tooltip That Shows When Hovering over it
This input field allows you to assign a tooltip on an image.
Tip
If you wanted to give credit to artists' photos, here would be a great place to put it. That way, anyone wanting to know a specific image's artist would be able to tell the source of any image they hover over.


Cropper
The Cropper section allows you to crop your photos.
To crop an image, simply drag the borders around and press the Crop Image button at the very top.
You can zoom in and out of the image by using the scroll wheel on your mouse.
When zoomed in, move the crop placement by dragging on the inside of the borders. Move the image by dragging on the outside of the borders.
You cannot, however, rotate images.

Aspect Ratios
The Width and Height Aspects along with the Change Aspect button allow you to change the Aspect Ratio of your images.
If you don't know what Aspect Ratios are, you can read about them here.
These are useful for consistent image sizes between images used across the CYOA.
Tip
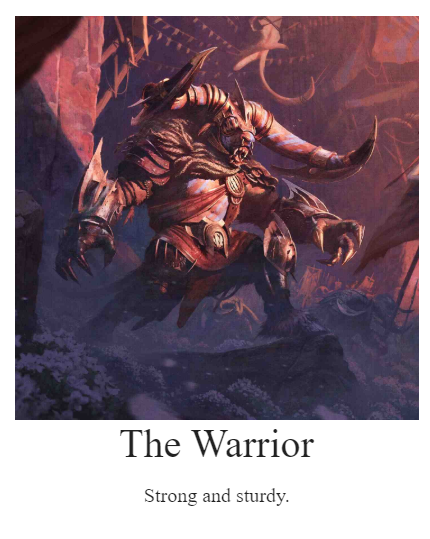
In order for a more uniform and orderly appearance, it is highly recommended you crop all of your images according to a specific aspect ratio and/or size.
See the difference below:


You can change the Aspect Ratio by inputting the desired Aspect Ratio in the Width and Height fields, before pressing Change Aspect. Afterward, crop the image as usual.

Compress
Compressing images is very helpful if your CYOA is taking up too much space, as the majority of space in the CYOA is taken up by local images.
You can switch to the Compress menu by pressing the Compress button up by the Cropper button. These are tabs, and pressing one or the other allows you to go back and forth.
Tip
If you want an alternative compressor, check out AvifCyoaCompressor. It can compress projects down anywhere from 30-55%.
Warning
According to the Creator, compressing will remove transparency from images.
This means:
- Do not use compression on images which need transparency.
- If you need to compress the entire project, don't forget to replace the transparent images afterward.

Warning
The built-in compression will not compress Addon images. You will either need to do that manually, or use a tool1.
Compressing an Image
Compressing an image is simple. Press the Compress Image button. Before that, however, you may wish to adjust the settings.

For these next two settings, keep an eye on the After file size on the left.
Image Scale
The Image Scale field dictates how the resolution of the image will be reduced.

Image Quality
The Image Quality field dictates how much the quality will be reduced during the compression. The lowest option
- A value of
100is (probably) the original quality - A value of
90is the default selection, and seems identical to the original
This option can go really low—saving a lot of space—before being super noticeable on some images.
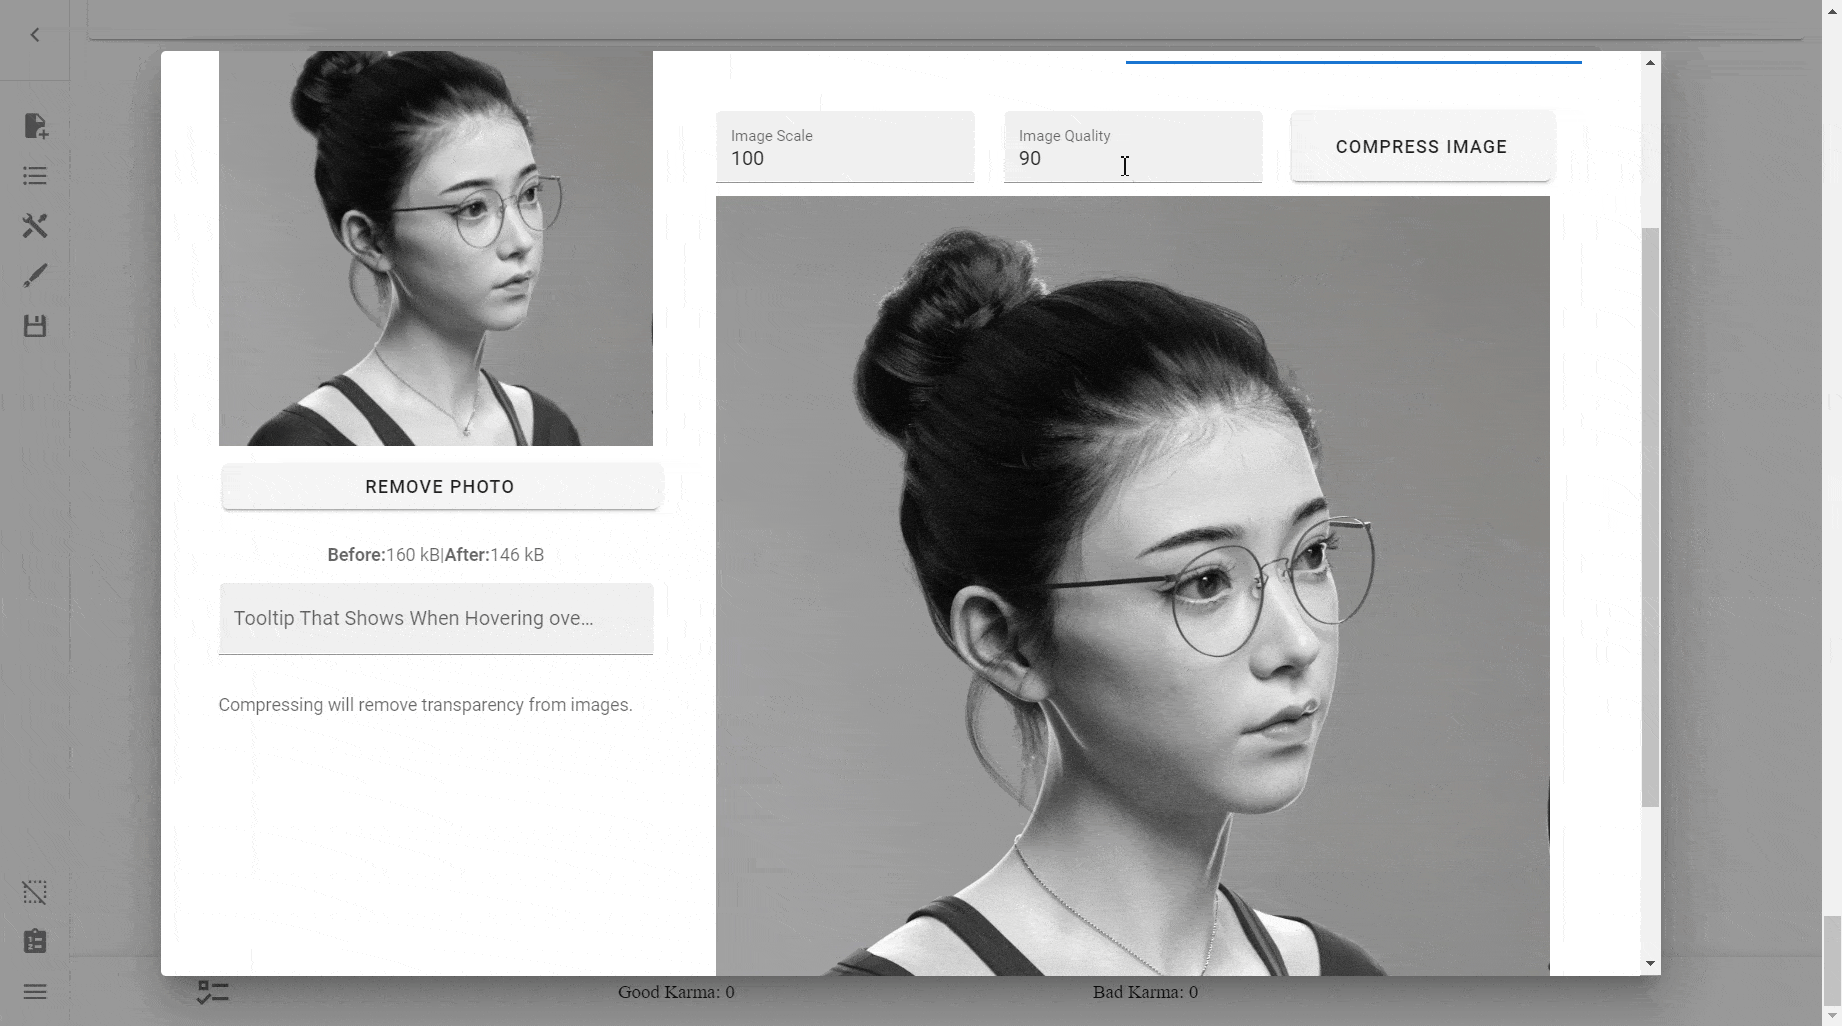
Ideally, you should strive for a balance between reducing the file size and having the noticeability of the compression.
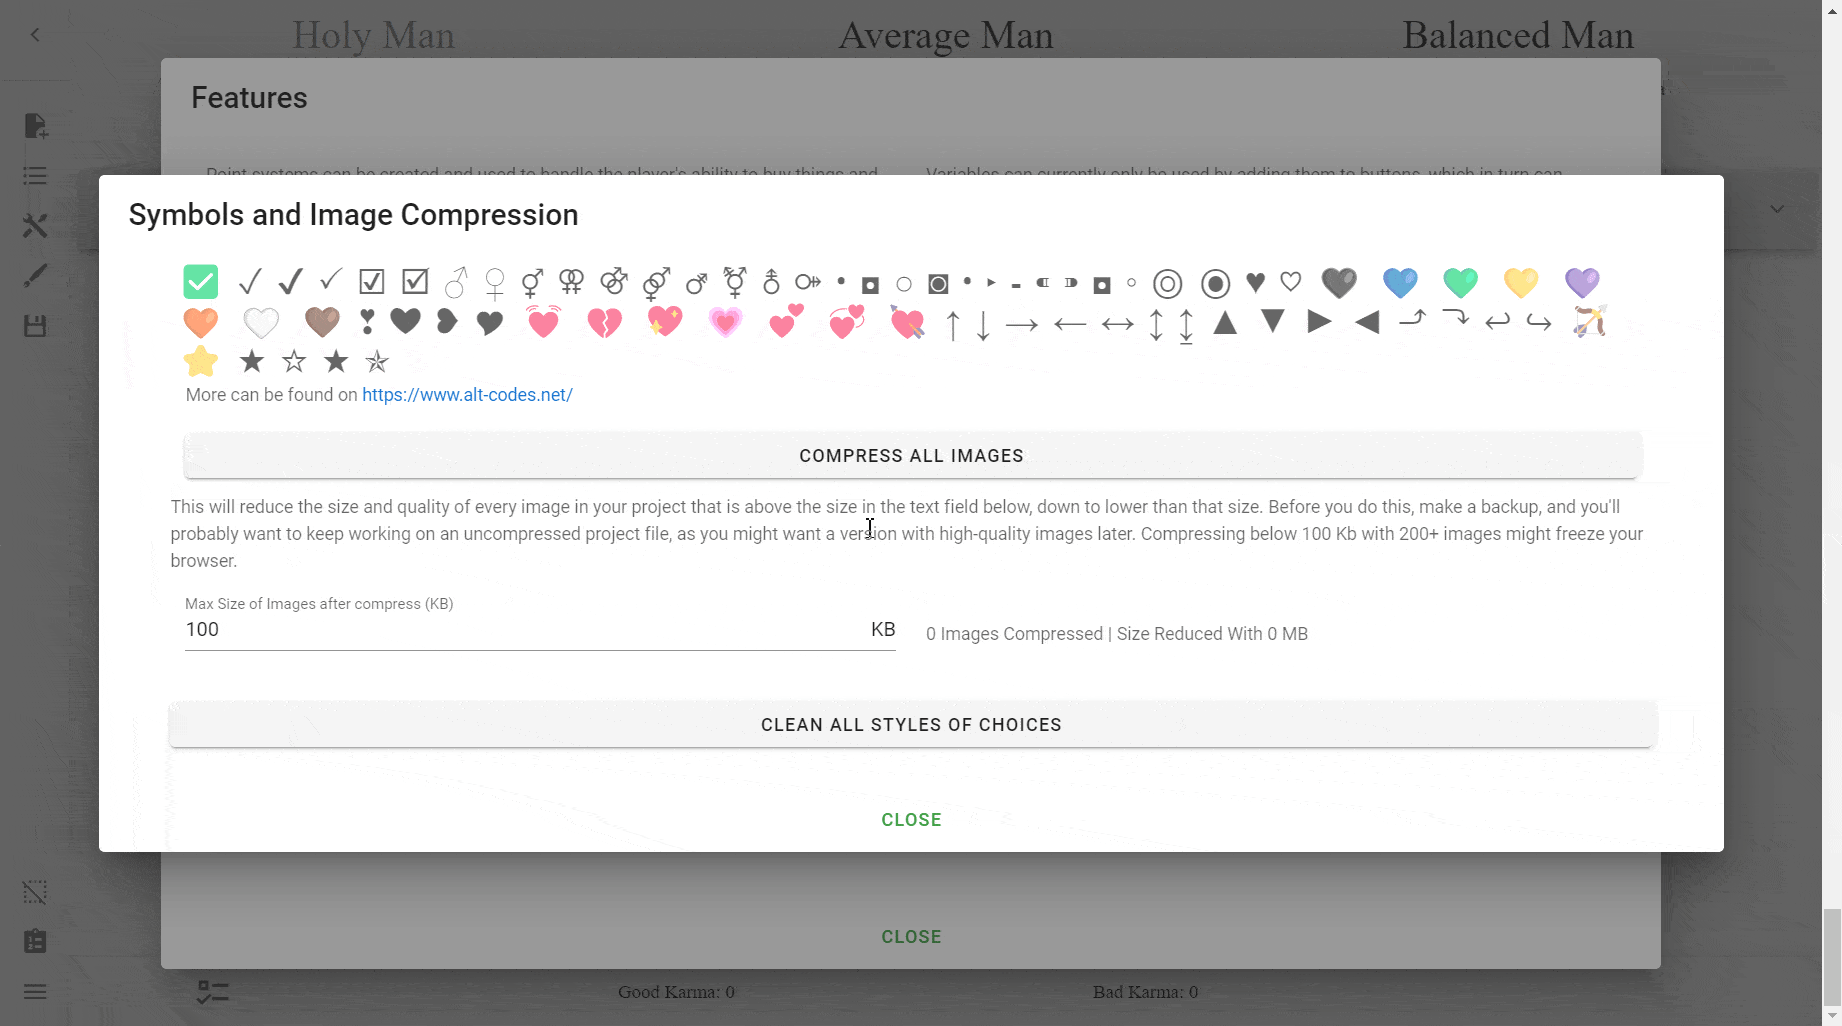
Compressing all Images
Compressing all images requires a different method, however. It is not found in an individual image's settings, but rather in Open Features → Symbols and Image Compression.
You should see this screen:

The field Max Size of Images after compress (KB) is the primary focus of this section. Filling in this field allows you to set the maximum size of all images in your ICYOA, compressing them to that size, regardless of the quality.
From the Creator:
This will reduce the size and quality of every image in your project that is above the size in the text field below, down to lower than that size. Before you do this, make a backup, and you'll probably want to keep working on an uncompressed project file, as you might want a version with high-quality images later. Compressing below 100 Kb with 200+ images might freeze your browser.
To compress after setting this option, simply press Compress All Images.
An alternative method for compressing the entire project is by using Agregen's CYOA Compressor. You could even use the two methods in conjunction if truly need to. However, if you truly are desperate to lower the size of your project, consider using external images.
Local vs External Images
Local images
Local images are images they you have uploaded directly into the Creator. They are the "Uploaded Images" above.
Exported Images
If you wanted to separate local images from the project.json, you can always export your project.
External images
External images are images they you have provided the Creator a link for. Whenever someone plays your CYOA, it will download it from that site from their computer.
There are pros and cons to using both local and external images. What you choose should depend on your use case.
| Upload type | Pros | Cons | Use case |
|---|---|---|---|
| Local | + Faster + More reliable + Can be altered | - Takes up space (too much space can crash the creator, and most free website hosts limit how much space you can use) | Smaller projects (<100 MB) |
| Exported local | + Same as Local + Keeps your project.json down | - Same as local - Harder to recover if the images are deleted | Larger small projects (>50 MB but <100 MB) |
| External | + You keep the size of your project.json down | - Slower - You have to trust the servers won't delete the image - Unable to be altered (cropped, compressed, etc) | Larger projects (>100 MB) |
Tip
You do not have to commit to one or the other. Sometimes, it's enough to just externally host large images and keep the rest locally.
Image host sites
Here are a list of sites that you can host your external images on. Feel free to provide suggestions in the comments below.
Warning
Keep in mind that your images should follow a host's terms and conditions in order to not have the image removed.
This means be extra cautious when uploading NSFW images. If you can, prefer to keep them local. If you absolutely cannot, pick a host that allows NSFW images.
Public:
- Imgur – No NSFW allowed
Private:
- Discord (open image preview → Open in Browser to get the link)
Template / Image Position
The Template dropdown menu is how you can decide where to place your Images relative to your Choices.

- Image Top: This is the default position. Images will be placed on top of the choice.
- Image left: Images will be placed to the left.
- Image right: Images will be placed to the right.

Reference
(TODO) Separate images from the project.json
You can easily separate images from the project.json file.
Note
This only works with [local images].
To do this, you simply go into Save/Load Project → Download Finished Project With Separate Images.
This will give you a zip file called hello.zip, which you can and should rename to something more helpful.
Extract the zip, and inside you should find your project.json with a hugely reduced size, and all the images you've uploaded separated in an images/ folder.
Next, move the project.json file and the images/ directory into the same directory as your Viewer.
ICC Quote
You can use the button below to save when you have finished your project, it will keep the images separated from the JSON. Do not overwrite your project, as the new JSON-file inside the zip this downloads will have no pictures if loaded into the Creator. Place the JSON into the app-file like normal, and the images-folder besides the other folders. If the project has a lot of images then they might end up not showing when someone loads on the page, if so then just use the normal way, and use Image Compression in features to reduce the size of the project file.
Allow <img> tag
The ICC doesn't allow using <img> tags by default, but this is bypassed in the modded Viewer, available here.
-
Credit to discord user
lemmiwinkzfor this. ↩