Points and Scores
Points
Quote
Point systems can be created and used to handle the player's ability to buy things and to keep a record of selected choices in a group or row.
Tip
A lot of ICYOA players use mobile to play CYOAs, therefore if you want to make a CYOA that has a lot of Point Types accommodating to mobile users, it is suggested that you create a Point Tabs menu by hiding points, and putting the ID of the choice in the tabs menu in the Id Needed To Show input.
The Point Types Menu
To open the menu, go into the Sidebar → Open Features → Manage Points.

Creating Point Types
To create a Point Type, simply press Create New Point Type. Afterward, the Point Type sub-menu will pop up, one for each Point Type:

Deleting Point Types
To delete Point Types, simply press the Delete button.
Danger
This option does NOT ask for confirmation before deleting, so make sure you're extra careful around this option.
Deleting a Point, especially for a larger CYOA, is incredibly time-consuming to recover from, so make sure you save often!

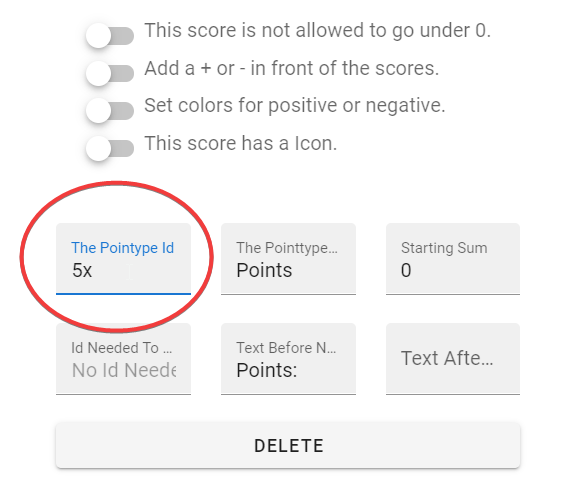
The Pointtype Id
The The Pointtype Id input field is where you can assign your own ID to your Point Type.
The Pointtype Name
To name a Point Type, simply enter the name in the The Pointtype Name input box. Its full name is usually cut off however, though you can find it in the centre of the top row.

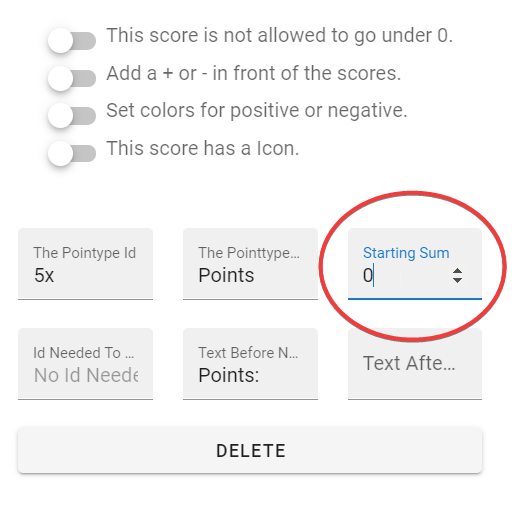
Starting Sum
The Starting Sum input field determines how many of that Point Type the players will start with by default.
Note
Starting Sum is always linked to the current value. That means if you select a choice by default for your user that affects this Point Type then it will change the Starting Sum too.
Id Needed To Show
The Id Needed To Show input field is a special one. By placing the ID of a Choice there, the Point Type will not show in the Point Bar at the bottom of the screen until the Choice with that ID is selected.

Text Before Number
The Text Before Number input displays what is shown before its value on the Point Bar.
Generally speaking, the recommended format for this is just your Point Type ID without underscores and in title case, followed by a colon, such as Points:, Perks:, or Powers:.
Note
You do not need to place a space after the colon, it is done automatically.
Text After Number
The Text After Number input is the opposite of above, and is what is shown after the Point value.

Switches
These are the switches above the fields.
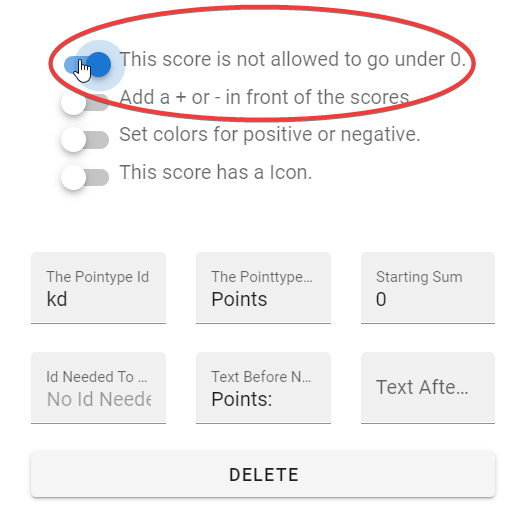
This score is not allowed to go under 0
This switch ensures that the score can NEVER go under 0. This means that if a user does not have a surplus of that Point, such that using them on a Choice would bring them into the negatives, then the Choice can not be selected.
Note
There is one exception to this, and that's when using options that can be selected multiple times. These choices bypass this requirement, so be careful with it1.
Tip
You should use this option sparingly, many people (myself included) try to get themselves into debt before having to decide on drawbacks to make up for it.
Add a + or - in front of the scores
This switch, as it says, prepends a positive or minus sign to the score of that Point Type.
Note
This does not affect Point Bar in anyway, but affects the Scores in Choices.
By default:
- If you gain points (i.e. the cost is in the negatives) it prepends a
+sign. - If you lose points (i.e. the cost is in the positives) it prepends a
-sign.
This is a good thing to have on, because by default it does not show the difference between positive (cost) and negative (gain), so you have to rely on changing the Score's Text Before field.

Invert the + and -
This is a hidden switch that is only activated when the above switch is activated. The behaviour of this switch is as expected, it swaps around the signs from the above switch.

Note
Both of the 'sign' options above do not change the actual functionality of gaining and losing Points, it simply changes their appearance.
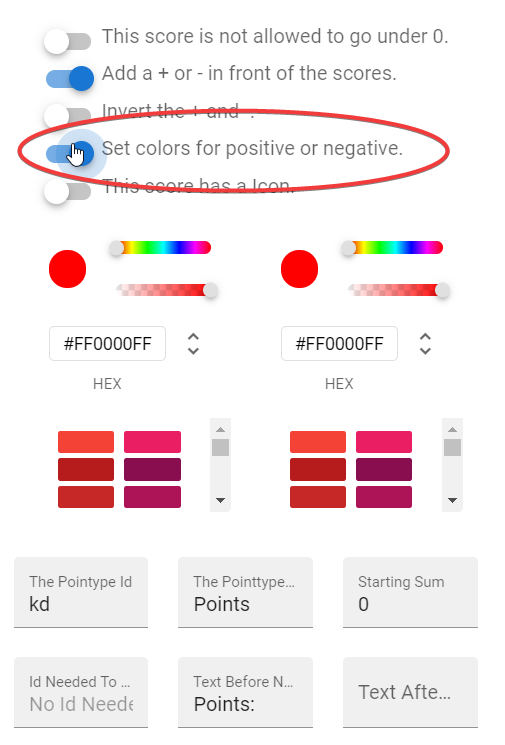
Set colors for positive or negative
This switch changes the colours of the Points in the Point Bar depending on if the value/score of the Point Type is positive or negative.
These colours are fully customizable, but, of course, it would be best to put positive as green and negative as red. If you don't want your scores to stand out normally, simply don't turn this on.
Warning
Sometimes you might discover that once you turn the option on, even if you turn off the colouring, it still happens. Should that be the case, simply change the colour of both to #000000FF (black) or whatever colour the rest of your text is in.


This score has an Icon
This switch opens up another subsection where you can change options for uploading an icon to attach to your Point Type.
Note
This does not show up in the Point Bar, but underneath Choices' titles
![]()
- Upload Background Image: This is where you upload the Icon for the Point Type
-
Image is on the Right/Left Side:
- Left unchecked: The Icon will be to the left.
-
Checked: The Icon will be to the right. !!! note
When referring to Right and Left, the creator thinks that if the switch is to the left, then it will go left, rather than applying the same order as "Right/Left".
-
Image is Before/After text:
- Left unchecked: The Icon is placed before the text.
- Checked: The Icon is placed after the text.
| Formats | Left Side | Right Side |
|---|---|---|
| Before | {Icon} Cost: 1 point | Cost: 1 point {Icon} |
| After | Cost: {Icon} 1 point | Cost: 1 {Icon} point |
Scores
Scores are what you apply to choices; they are what allow you to actually gain and lose Points.
Creating Scores
To create a Score, go to a Choice's options, and press the icon that has 9+ inside of it.
It will be minimized by default; open it up by clicking on the Scores: n block that should have appeared.
Point Type
In the Score menu, you can select which Point Type you want the Score to apply to. Simply press the dropdown menu, and select your Point Type.
It will list the Point Types by the names you had picked for them earlier.

Value
The Value field tells the program how many points to take away or give.
See how to add and subtract points below.

Text Before
The Text Before field tells the program what text should be before the value.
Tip
Change this to something like "Gain:" or "Gives:" when adding points, unless you're indicating whether with a plus or minus sign, in which case it's optional.

Text After
The Text After field, much like the Text Before one, shows what is displayed after the text.
Tip
You should change this according to the Point Type name, e.g. "points" → "shard points" or "mana" etc.
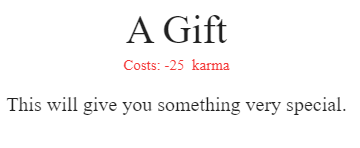
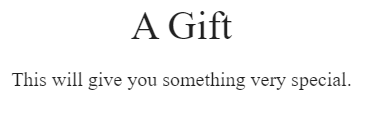
Show Score?
Normally on by default, this switch allows you to hide what points may be added or subtracted. This can be useful if you had hidden mechanics that aren't relevant to the end-user, or if you had an image that shows how many points it costs already.
Subtracting Points
In order to subtract from a Point type, simply type a positive integer into the Value field.
E.g. 10 subtracts 10 points.
Adding Points
In order to add to a Point Type, simply type a negative integer into the Value field.
E.g. -25 adds 25 points.
Why negative numbers?
As subtracting is the default behaviour, and there is actually no in-built method of adding, creators have to hack the ICC by using the mathematical rule that subtracting a negative produces a positive.
(TODO) Multiply Points
You can multiply Points using an Object Function.
Warning
According to the Creator:
Not to be used on choices with scores.
Wont work if the Allowed Choices on the row is bigger than 0.
(TODO) Divide Points
Reference
Hide Point Types
Go to the Sidebar → Open Features → Manage Points and find the Point Type you want to hide.
In the Id Needed to Show field, type something you would never use as an ID, such as HIDE_ME. As an object with your chosen ID should never be selected, the Point Type should be ID.
Tip
Should you choose the exact same ID for all hidden options, you can have a special button you only activate for debug purposes that allow you to see all the hidden Point Types.
(EX TODO) Display Hidden Point Types when a Choice is selected
Do the same as Hide Point Types, but instead of an ID that won't be selected, purposely choose the Choice's ID that will show the Point Type.
Example
…
(TODO) Limit how many of an arbitrary group can be selected
I find it particularly useful in hidden point types that determine how much of a thing you’re allowed to select
This uses hidden Point types.
(TODO) Making discounts
Discounts can be made using requirements.
Get a list of Point Types
To do this, first, [open the console].
Then type this:
| JavaScript | |
|---|---|
It will output a list of Points by their name and their value.
It should look like this:
Change how many points I have
This is a hacky way on how to change it as a player.
There are two methods:
- Use the [IntCYOAEnhancer script] to [change the values][ice-cheat], or
- Manually edit it in the console
We'll be showing the second solution here.
To do this, first, [open the console].
Then, get a list of Point Types. Find the ID associated with your Point Type on the left most side surrounded by square brackets. Keep a note of that number.
Then type this:
| JavaScript | |
|---|---|
Replacing:
0with the ID of your Point Type1000000with whichever number you desire.
-
Credit to
faywildson Discord for this ↩