Rows
The basic building block of Interactive CYOAs made with this creator is the Row. Rows are not only the sections that divide the CYOA up, but it is only attached to a Row where Choices can exist. In that way, Rows can be seen as groups of Choices.
Creating Rows
Create a Row by opening up the sidebar and pressing Create New Row.
Cloning Rows
 To clone or copy a Row, press this button.
Cloning rows can be useful when you have private styling or a specific set of choices you need to repeat.
Deleting Rows

To delete a Row, press this button, and then OK.
Editing Rows
 To edit a row, press the wrench/spanner icon.
This will open the edit menu for the row.

Row Title
By default, the row title will be Row.
As Rows are generally sections (such as Powers, Perks, Drawbacks, etc), you should name your Row after what the Objects represent.
To edit the Row Title, simply edit the text in the Row Title section.

Row Text
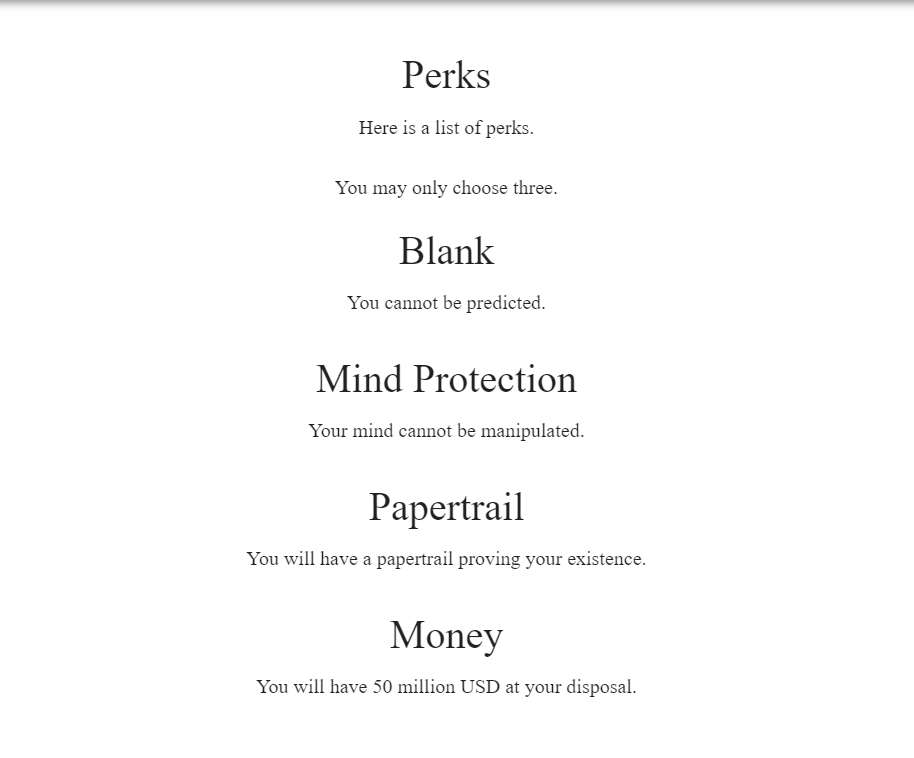
Row Text can be used to provide a description of the section.
You can also use it to provide notes specific to the section in particular, such as informing the players that they can select only 1 option.
To edit the row text, simply edit the text in the Row Text section.
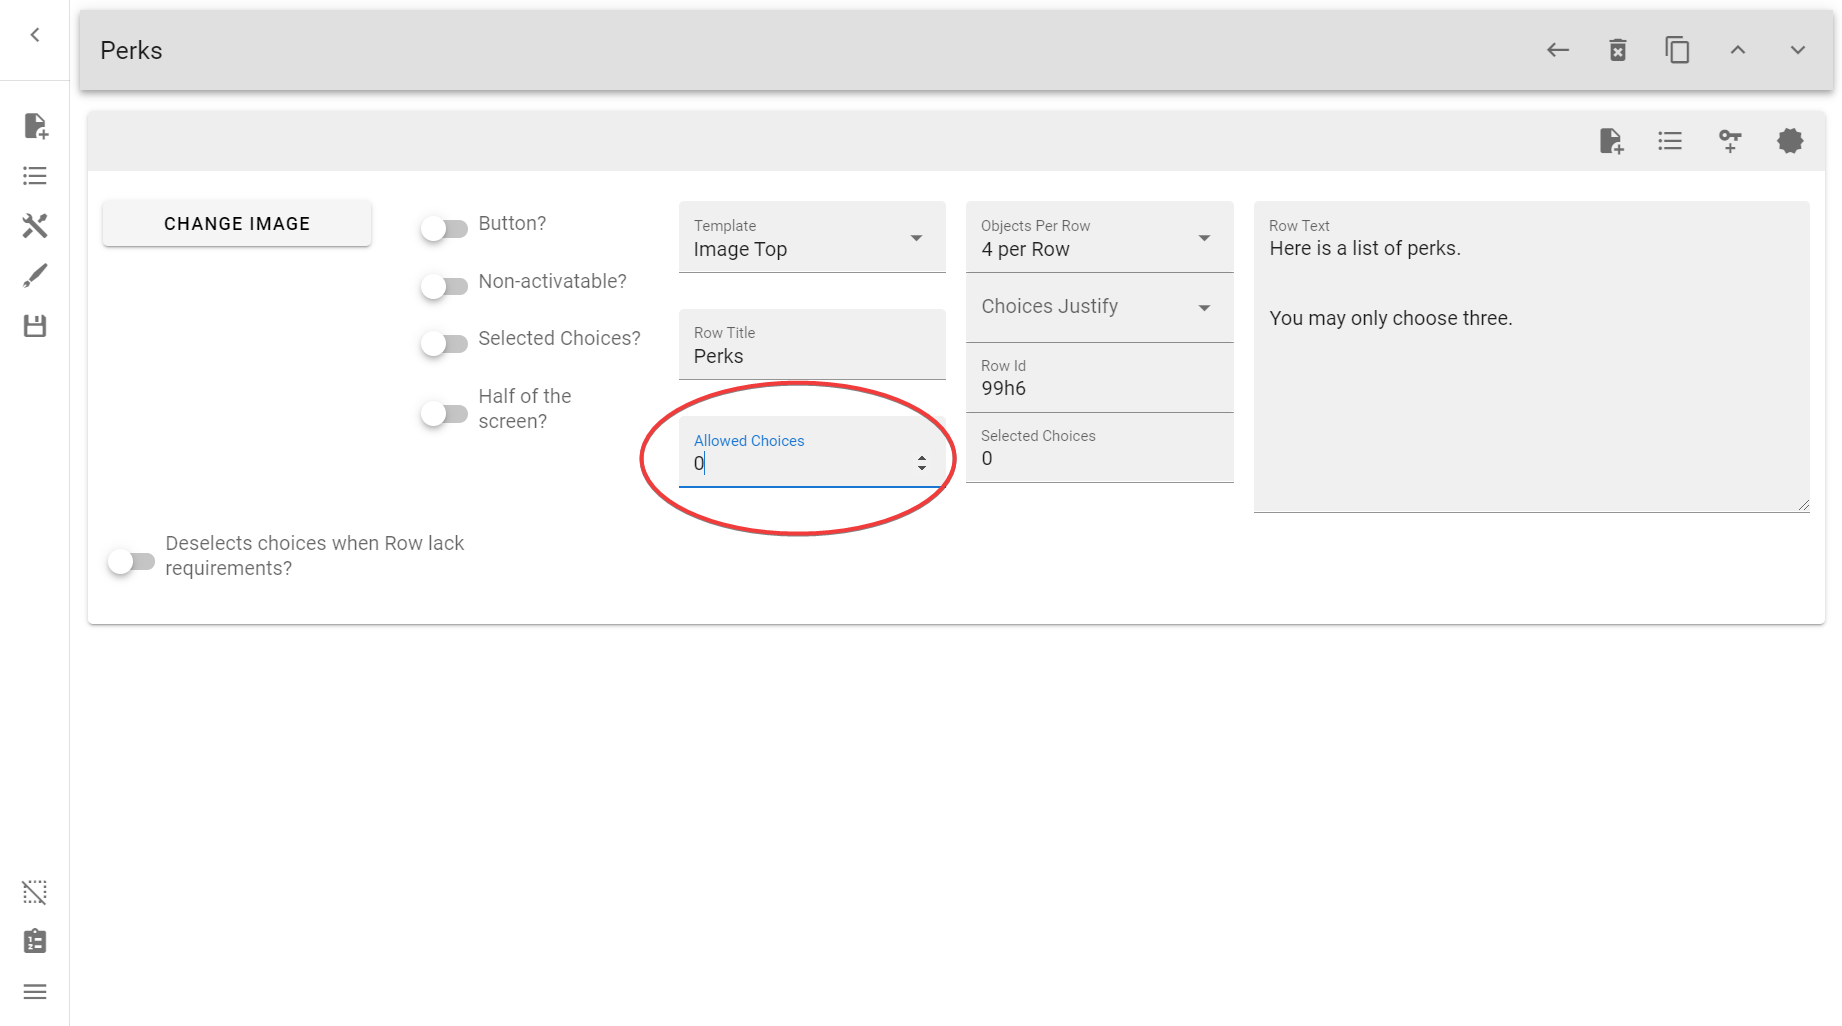
Allowed Choices
The Allowed Choices options allows you to restrict the amount of choices a player can pick in that row. It takes a non-negative integer (anything above zero).
If you want ANY number of options with no limits, simply put 0 into the field.
This is used for sections where you might say "You may only take X options".
There will be a way to dynamically change this amount, but we’ll come back to that later (to skip ahead, see here).

Selected Choices (Input)
The Selected Choices field will show how many choices are currently selected, and should normally be 0. An exception would be choices that are selected by default.
Danger
You should not change this value unless you know what you're doing.
If it is something other than 0 and no choices are selected, then something has gone wrong. You can fix this by changing the value to 0.
Objects Per Row
The Objects Per Row option allows you to specify how many Objects should be present within an Object row.
Tip
The optimal number depends on the amount of text you use in the descriptions.
If the description is only a few words, you can use as many as 7 or 8. The ratio of text height will still be nice.
But if there are several sentences, please use only 4 or 5 max. Otherwise, the text will stretch into a completely unpleasant and uncomfortable to read column1.


'Row' Objects per Row
Note
This section may get confusing for beginners, so feel free to skip ahead if you don't understand it.
Objects per Row – This is set within a Row's options
Object Width – This is set within an Object's options
Most Objects per Row options seem pretty straightforward, but this one in particular might get confusing. It is in fact not used by a Row (though the option is bafflingly there), but is instead used for individual Objects' Object Width.
To give context, individual Objects of a specific Object row (not referring to the Row object, but an actual row—as opposed to column—of Objects) can set a custom Object Width, allowing further customization and deviance from a Row's Object per Row setting.
- For example, you can have one row have two Objects take up an entire row by setting both of their Object Widths to 2 per Row, and the next row could have five Objects take up the entire row by setting their Object Widths to 5 per Row.
Objects have an Object Width of Row by default, and that means that their width is equal to whatever is set by the Objects per Row setting. This is convenient in that you don't need to go into each and every choice width and update it, instead only updating the Objects per Row once.
If you have changed an individual Object's Object Width, then setting back to Row resets it back to the default width.
Non-Activatable?
This option makes it so Objects are unable to be chosen.
This can be used when you just want to supply information using Objects.
Objects are great for this because they allow you to split information into chunks, each with an image able to be attached, as well as any Addons that might be attached to said Objects.
Help and Instructions
The third button will make it impossible for a player to change any of the choices, if one is selected then it will stay selected and vice versa. Good to use when the user should be given information or story, and not choices.

Selected Choices? (Switch)
The Selected Choices? switch enables a whole host of other options that have to do with the Objects in the Row.
Options here can do two things:
- They display choices you've already selected, and
- They can change something about all Objects in the Row
Help and Instructions
The middle button named 'Selected Choices?' can be used to make the row show all choices that have been selected, good to use at the end of the project to let the player see the choices they have made. A private row design should be used to make filters invisible.
By default a Row with this on will collect all choices that are selected. You can use the below switch to filter this into only the Objects from the Row you want Alternatively, if you don't make a group by Row, and instead Add To Group on Objects manually, you can further refine your selection.
Selected Choices from Group Id
The Selected Choices from Group Id switch displays selected choices, but only if they are a part of the same Group.
Note
- Rows can be a part of as many Groups as you want
- You can select multiple Groups for this option
Although the Process tab shows how to set up a Group for this demonstration, it is not fully detailed. In-depth detail on Groups is provided here.
Choices will all be 'Template Top' and Row Width
This will set it so that each choice that appears in a Selected Choices Row will be normalized. Every image will be at the very top, and it will have Row Width by default (see here for an in-depth discussion on that).


Remove the text of the choices
This will, as it explains, remove the body text/description from choices, leaving only the title and images.
Warning
It is advisable that you also select Choices will all be 'Template Top' and Row Width as well, since this option will only remove the text of choices that have an image at the top.

Show the title of the row in the choice.
Another self-explanatory one, it will display the title of the Row above the choice's title. This is quite useful in cases where you have a list of choices that occur from more than one section, so that you can tell choices apart.

Half of the Screen?
This switch will allow you to have two Rows, each on one half of the screen. This option can be quite useful.
Deselect choices when Row lacks requirements?
This switch deselects all the selected choices if the Row itself lacks requirements (and thus is most likely invisible).
If this option is off, then selected choices are preserved.

Row List (Side Menu)
See here.
Change Image
This button allows you to upload an image to the Row. See more at Images.
Row Settings
The Row Settings menu is a menu accessed from any Row.
To access it, press the button at the very top right inside of the Edit Row menu.
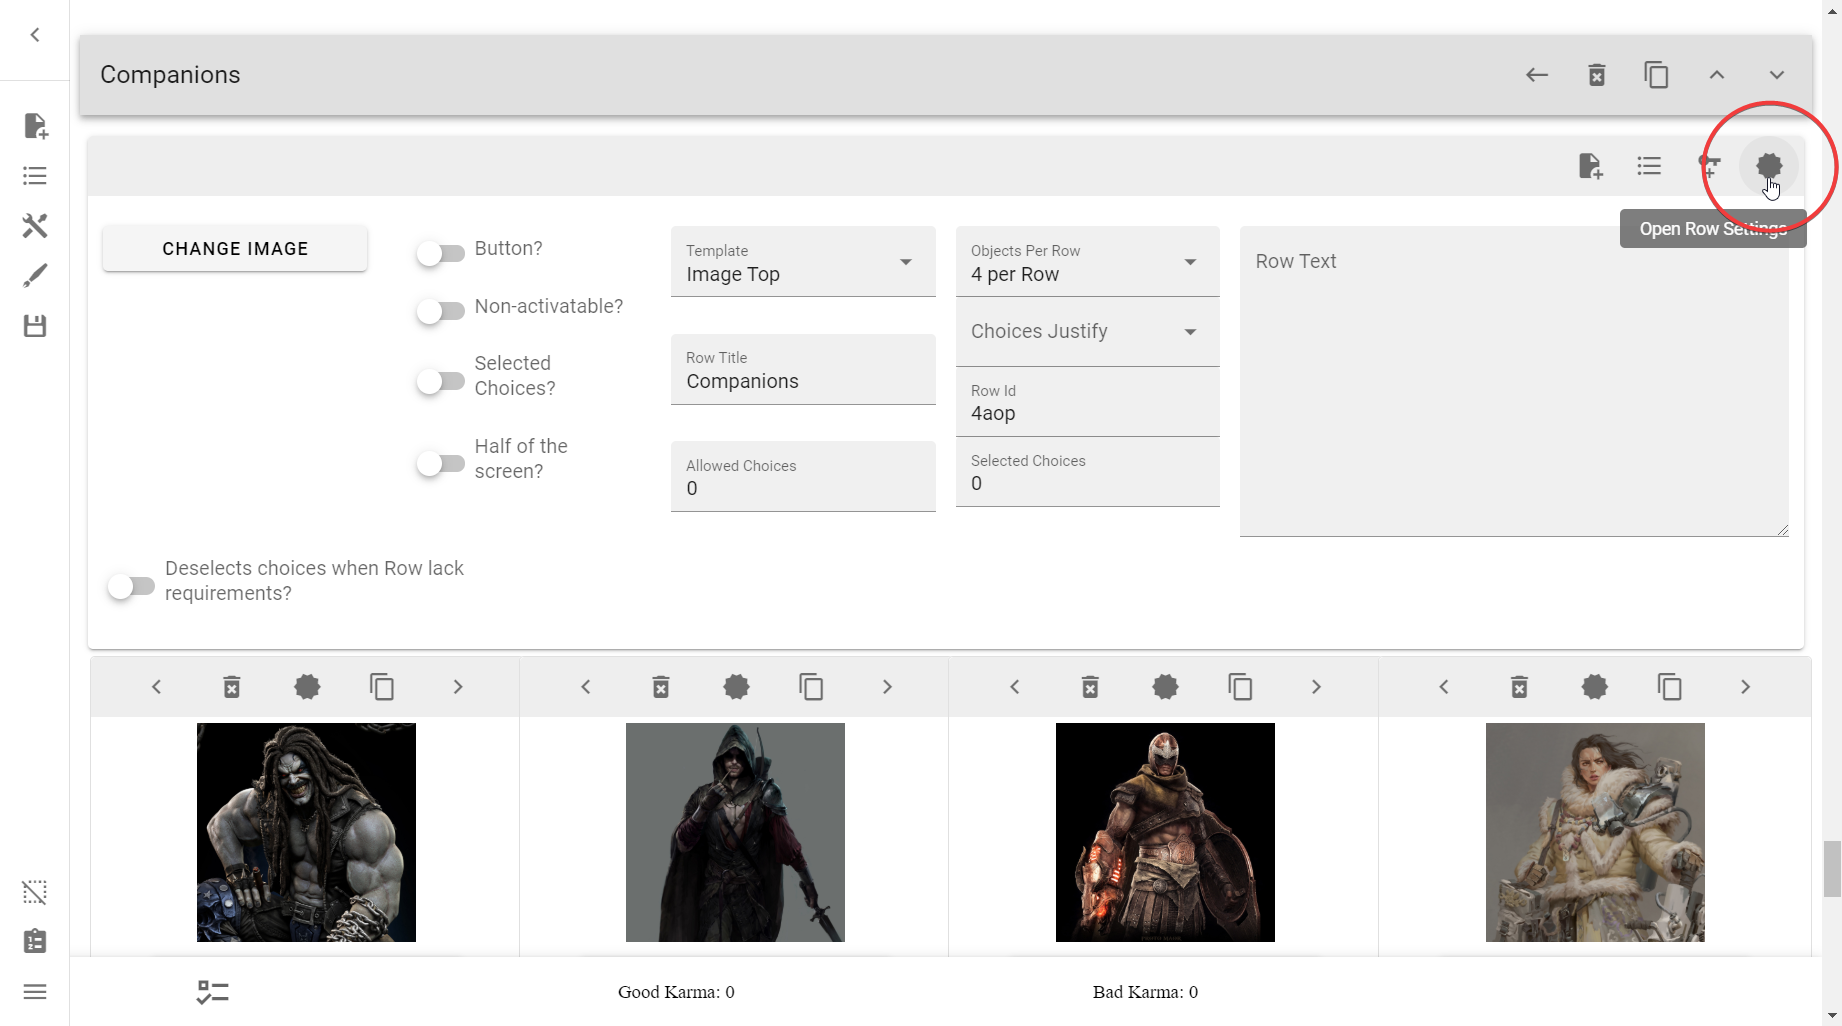
This will open up the Row Settings menu:

Sort The Choices In The Row
This option allows you to change the order of the choices within the Row. This can be quite a useful option. It is found within the Row's settings.
To access it, open Row Settings → Choose an option for sorting → Press Sort.
The options are:
- Object Width - Biggest to Smallest.
- Object Width - Smallest to Biggest.
- Text Length - Longest to Shortest.
- Text Length - Shortest to Longest.
Object Width sorts by how much space in a row Objects take, whereas Text Length sorts by how much text is within the Object Text field.
Copy Choices Into Another Row
This option allows you to copy all the Choices of one row into another Row.

Copy this row's objects into...
This is a dropdown menu which lists all of the Rows in your project by their title.

Copy
This button copies all of the Choices of the Row whose settings you are in, into the Row you've selected in the dropdown list.
Copy and Delete
The same as copy, except it deletes the original Row where it came from.
Warning
Make sure you do not need whatever else was in the Row, such as the Row title, description, Requirements, etc.
Why use this instead of cloning the entire Row? Well, let's say we have three Rows:
- Male Companions
- Female Companions
- AI Companions
And you had already configured Scores and Requirements, and didn't want to redo it all. You could clone them separately, but they would not combine into one.
With this method, you can create a new Row named Companions, and go to each of the Rows and Copy and Delete the Choices in each of their Rows, effectively combining their Choices, including all of the Scores and Requirements therein.
See it in action

Group Membership
This option allows you to add all Choices in the Row to any Groups you have set up.
See Groups.
Reference
(EX TODO) Make a Row invisible
If you want to make a Row invisible, simply add a Selected Choice requirement, but simply don't put any ID in its place. This will permanently collapse the Row.
Alternatively, put an ID in there that is guaranteed not to get picked, such as MAKE_ME_INVISIBLE.
Example
…
Hide a Row until a Choice is pressed
Tip
If you wanted to use a Button to do this, consider looking here.
Rows can be hidden by using the Add Selected Choice requirement. In order to open a Row, you would need to select a choice.
Tip
Doing this is highly recommended when an ICYOA becomes long enough.
This can be used to create a 'Tabs' / Table of Contents menu, which is gone into more detail about here.
Example


Warning
If you decide to delete a requirement by removing its text, you may notice that the Row—even though the requirement is empty—does not show. Make sure to press DELETE underneath the Selected Id input to get the Row working as intended again.
This can, however, be used on purpose, in order to make a Row invisible.
Now, of course, you do not need to use Selected Choice to hide rows, and can use any number of requirements. It is, however, the most common requirement to use.
Nested Rows
While nested Rows can be useful, especially for long ICYOAs which require a lot of scrolling, there can be a couple of downsides.
- Nesting more than 2 down levels can lead users to be confused and annoyed as to where certain sections are.
- If Nested Rows are not set up properly, they can leave Orphaned Rows.
Orphaned Rows occur when a chain of Nested Rows aren't set up so that closing the topmost parent Row closes not just any Rows that depend on it, but also Rows that depend on the topmost Row's dependent, and so on and so forth.
To do this, use Selected Choice requirements for each nesting level.


u/Traveller-81 goes into more detail here:
Tips and Pitfalls for Interactive CYOA Creators (Reddit)
The third common pitfall is row nesting, specifically how NOT to do it. Now nesting rows in and of itself isn't a bad thing. It prevents having to scroll through hundreds of choices to find the section you want (one of the few design flaws of the WoW ICYOA listed above). Instead, you design the various rows to only show when the prerequisite choice is active, basically showing up at the push of a button. Nesting rows occurs when the button for a row is inside another row, which can be inside another row, and so on. Overusing this can lead to your users being confused and annoyed, having to search through nested row after nested row to find the section they want. Not fun. Finding the right balance between "ALL THE CHOICES" and "Where the hell is it!" is important.
Another problem with nested rows is avoiding orphaned rows. Orphaned rows occur when attempting to close multiple levels of nested rows by closing the top row leaves the lower rows still visible. This is an annoying design flaw that forces your users to close nested rows in order, every time.
What's worse is if the button for a nested row is a choice you want to keep, leaving you unable to close the orphan row without screwing up your build. This is both aggravating and very unprofessional. To counteract this, require all your nested rows to need all previous levels active to appear. Thus, if you close an upper level, it will close all lower levels. This does become slightly tedious to code the deeper a nested row is, however.[^1]
(EX TODO) Combining Multiple Requirements
Chaining multiple requirements onto one object means that you require all of those requirements in order to allow the object to be chosen or shown.
Note
You can use multiple requirements and scoring to make discounts on options.
An example of this logic in pseudocode would be:
- "If this choice that gives a discount is selected, then it costs 5 points"
- "If this choice that gives a discount is not selected, then it costs 10 points"
You can learn more about making discounts here.
Example
…
(WIP) Nesting Multiple Requirements
Nesting multiple requirements means to apply requirements onto requirements themselves. This type of advanced behaviour can get quite unwieldy.
-
Credit to Dragon's Whore for this ↩