Publishing on GitHub
What is GitHub? GitHub is primarily a place to store code in "repositories". Repositories (or repos for short) are essentially folders, where each folder is a project for one or more applications, libraries, or something else.
Luckily for us, code includes the Viewer and the project.json! Using GitHub is good because there is no limit to the amount of repositories you can create, and they are very generous with storage space, allocating it per repo rather than per account.
Limits
GitHub has these limits:
- A recommended limit of 1 GB per repository
- A soft bandwidth limit of 100 GB per month
- A soft build limit of 10 builds per hour, if using the default GitHub Pages (Jekyll), rather than a custom GitHub actions workflow (like Static HTML)
- You are only allowed one account, but you can create unlimited repositories, hosting an unlimited amount of 1 GB subfolders under your custom domain.
- Repos must be public to use GitHub pages (this is fine because project.json files are stored in plaintext anyway)
See here for more info.
Creating an account
To create an account, first go to the site here: https://github.com/
That should bring you to this page:

Press the Sign up button in the top right and sign up like you usually would!
You should land on this page now:

Using a Template
I've made a nifty GitHub template that comes pre-packaged with:
- Hyperlinks enabled
- IntCyoaEnhancer's Download Progress Indicator
- Optional CSS code in the
index.htmlto:- Make your backgrounds static
- Change the colour of your Point Bar icons
- Override the background image in the
project.json
- An automatic GitHub workflow to republish your site on any change
It's located here. Text instructions are included in that repository, or you can watch the video below for a short 2 minute tutorial on how to host on GitHub:
Creating a repo
If you didn't want to use the template you can instead set up your repository manually. This will show how to do so.
You can create a repo in two ways, by pressing the green New button on the top left, or expanding the + button on the top right, and pressing New repository.
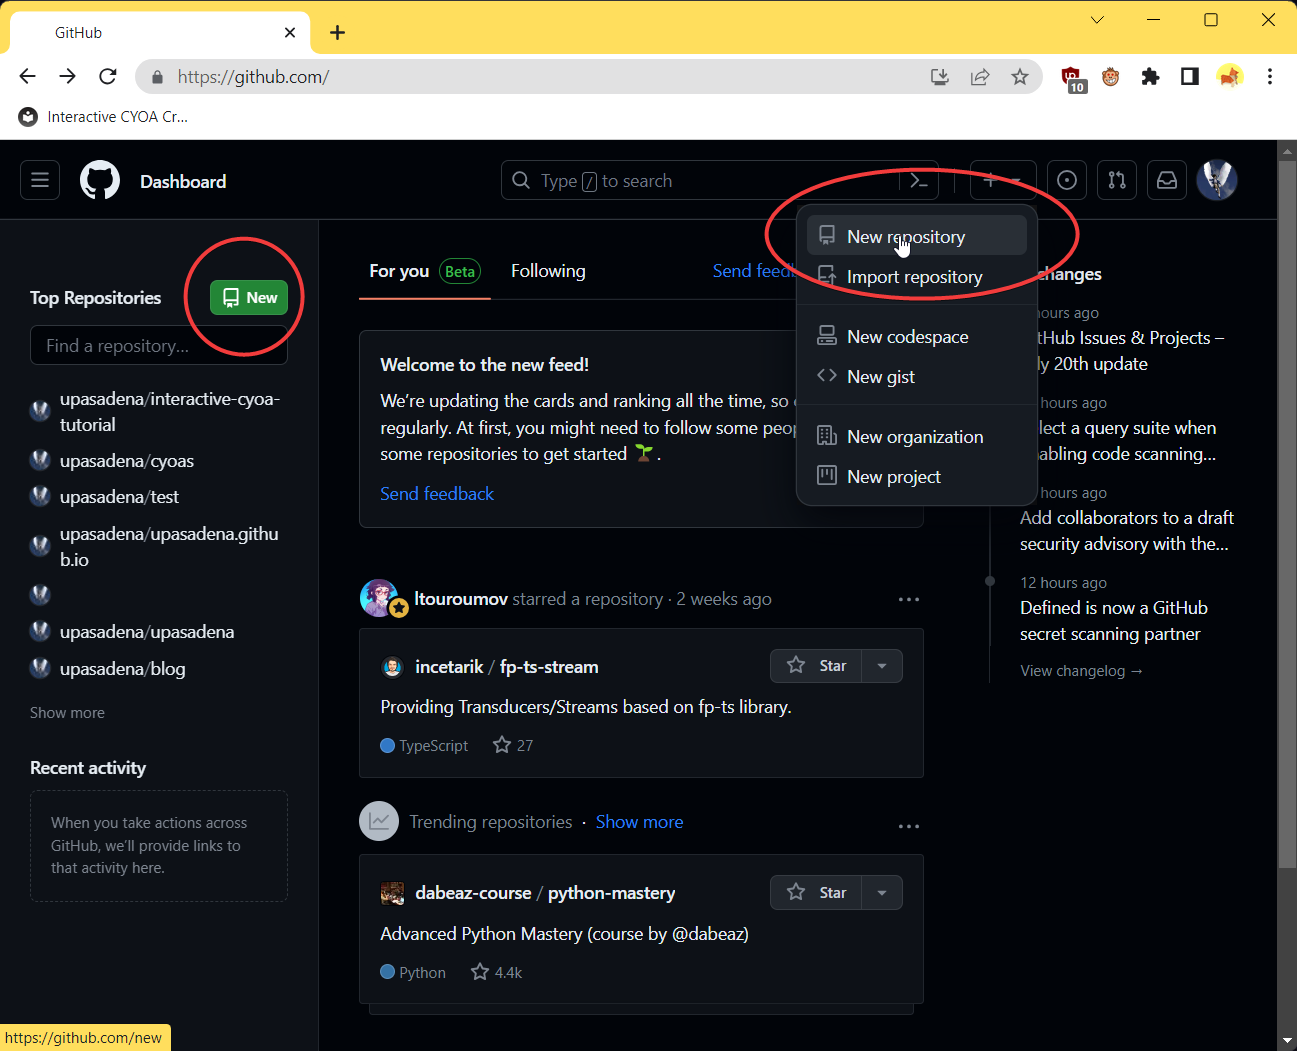
This should open up this form:
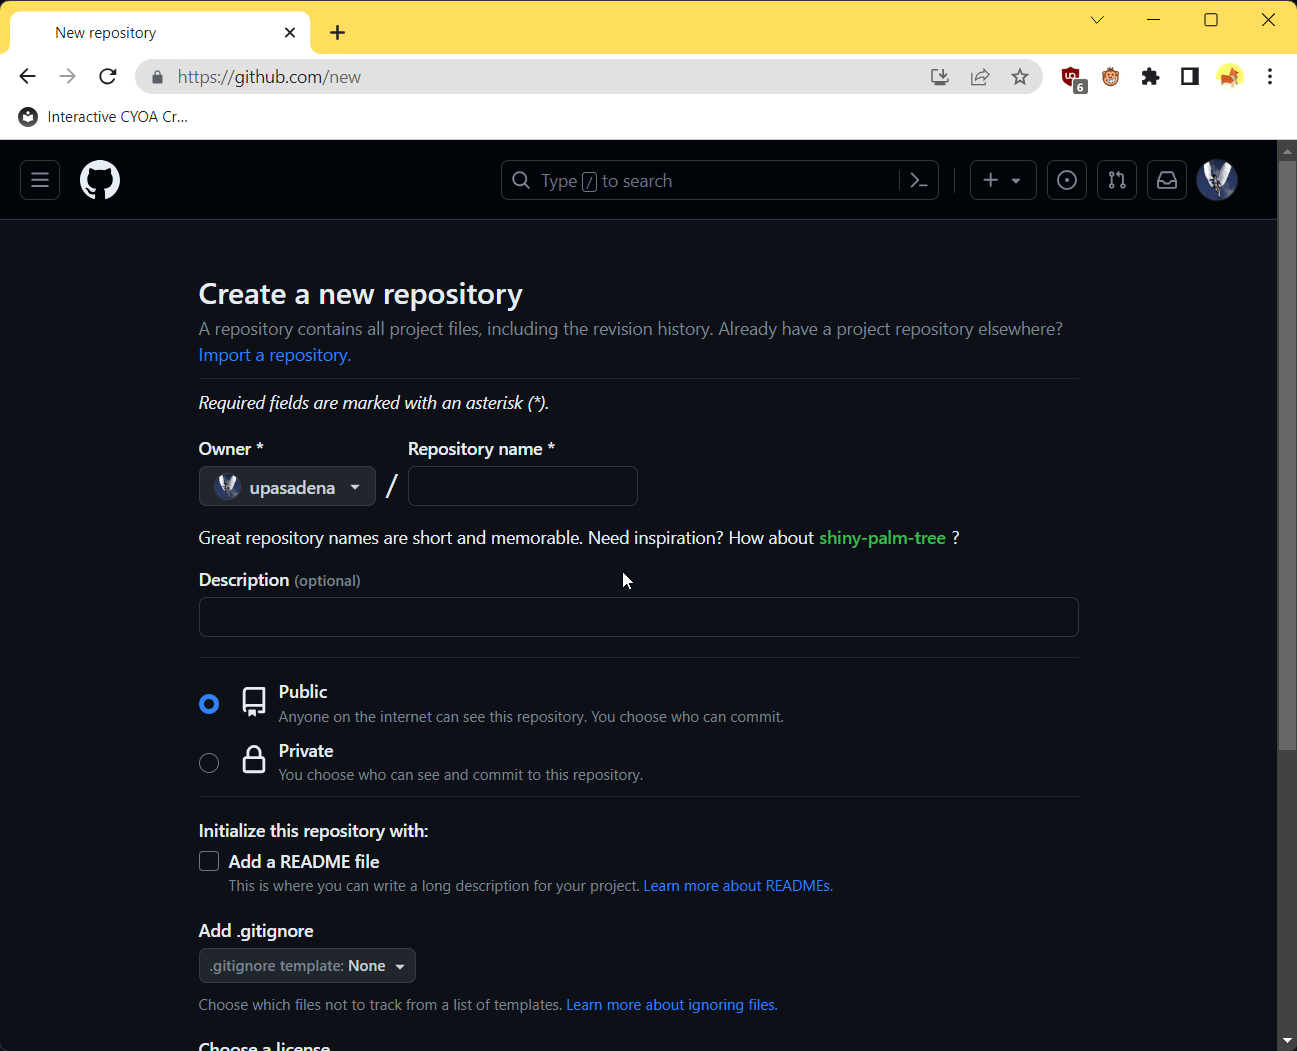
Repository name
This option is how you select the name of your project. I would recommend naming this after your cyoa, completely lowercase and with dashes instead of spaces (spaces will automatically be converted to dashes by GitHub).
Tip
I would recommend creating a new repository for each CYOA (at least, if it becomes too big). This is because some CYOAs can get incredibly big (JRPG Traitor is 363 MB even with compression), and having multiple huge projects in one repo can cause problems, such as longer waiting times for the site to deploy.

Description
As this says, it is optional. It shows to you and anyone viewing your GitHub a short summary of what it's about.
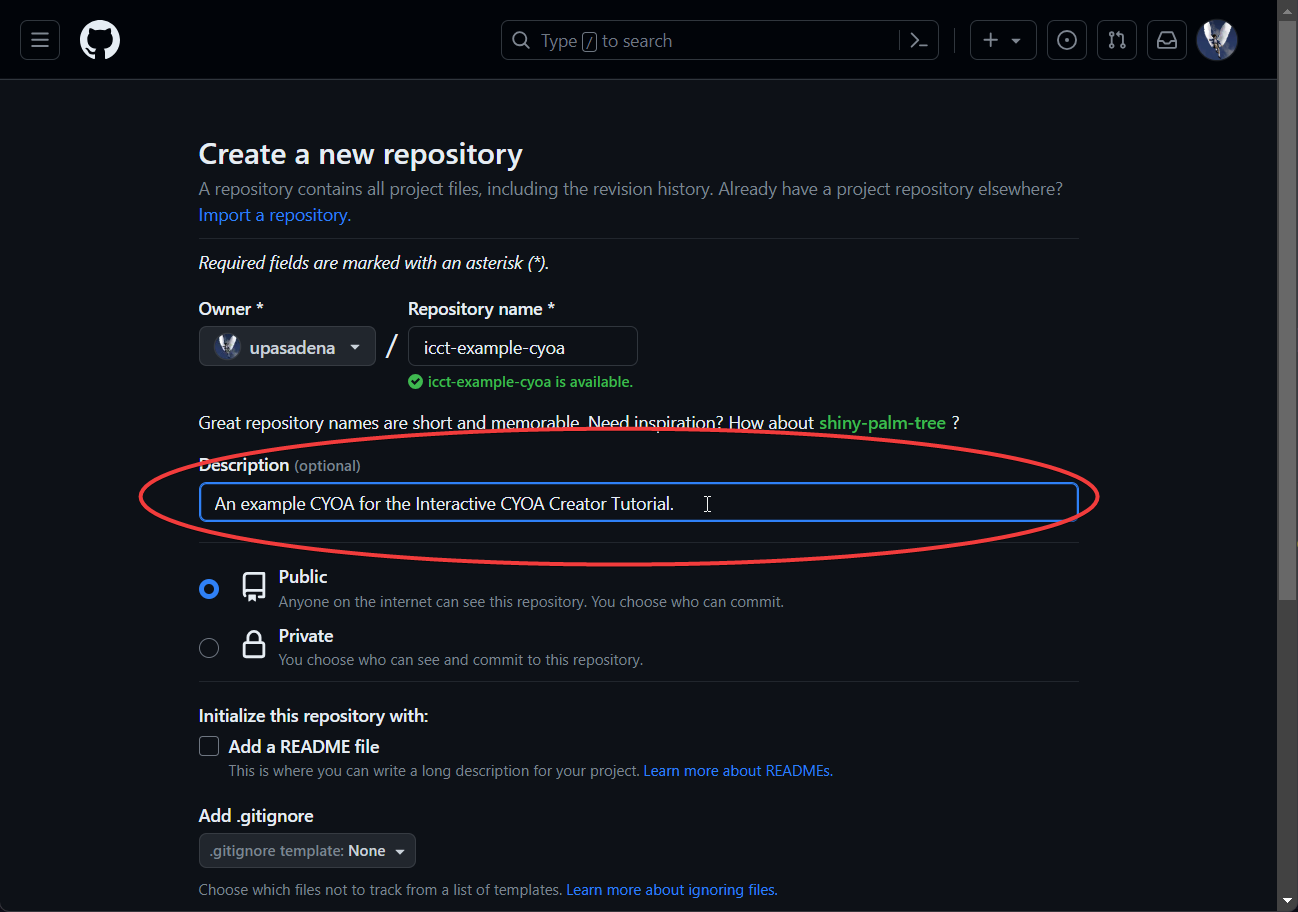
Public or Private
Keep this on Public if you're a Free user. Free users cannot host Private repositories (though they can still use them).
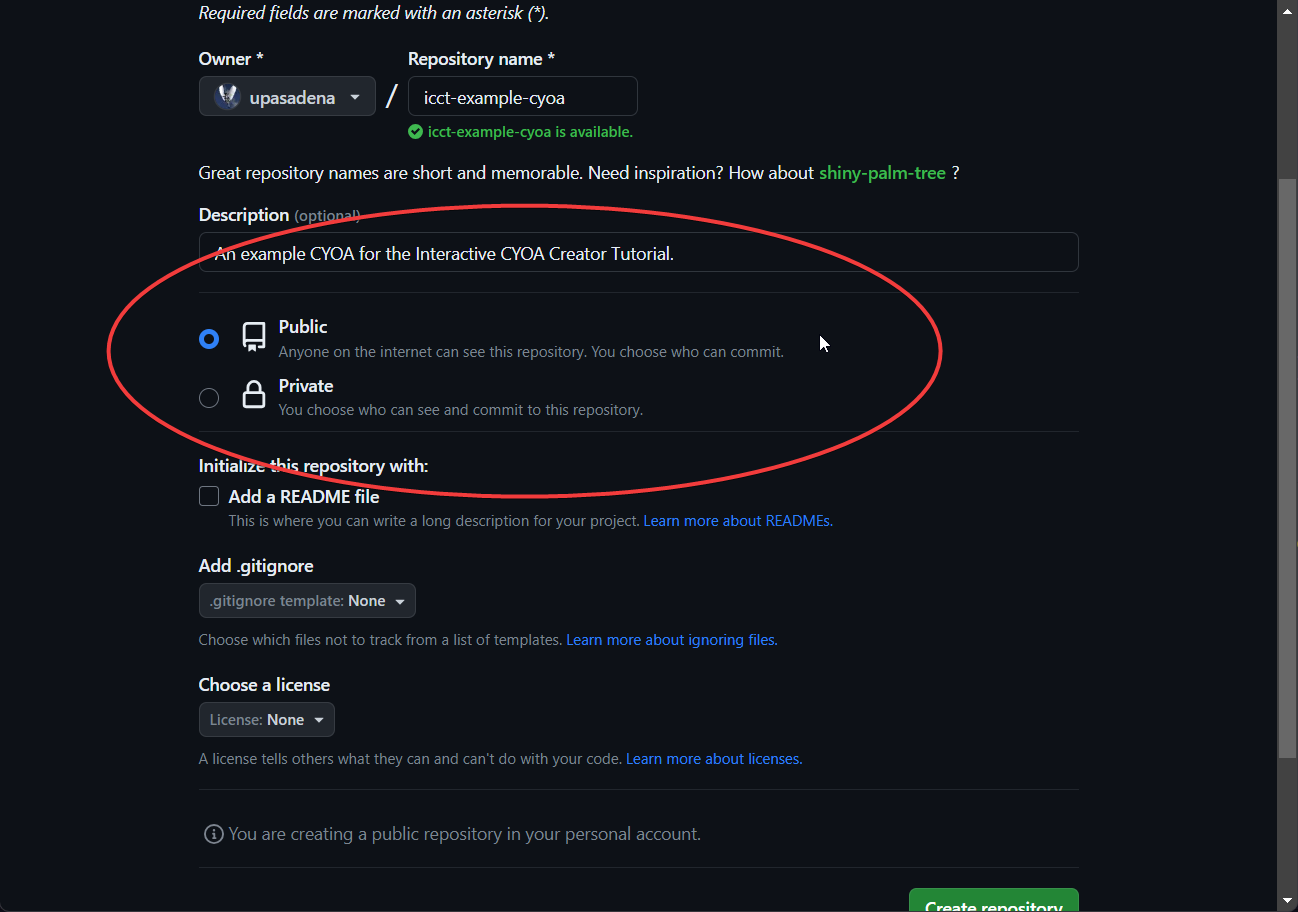
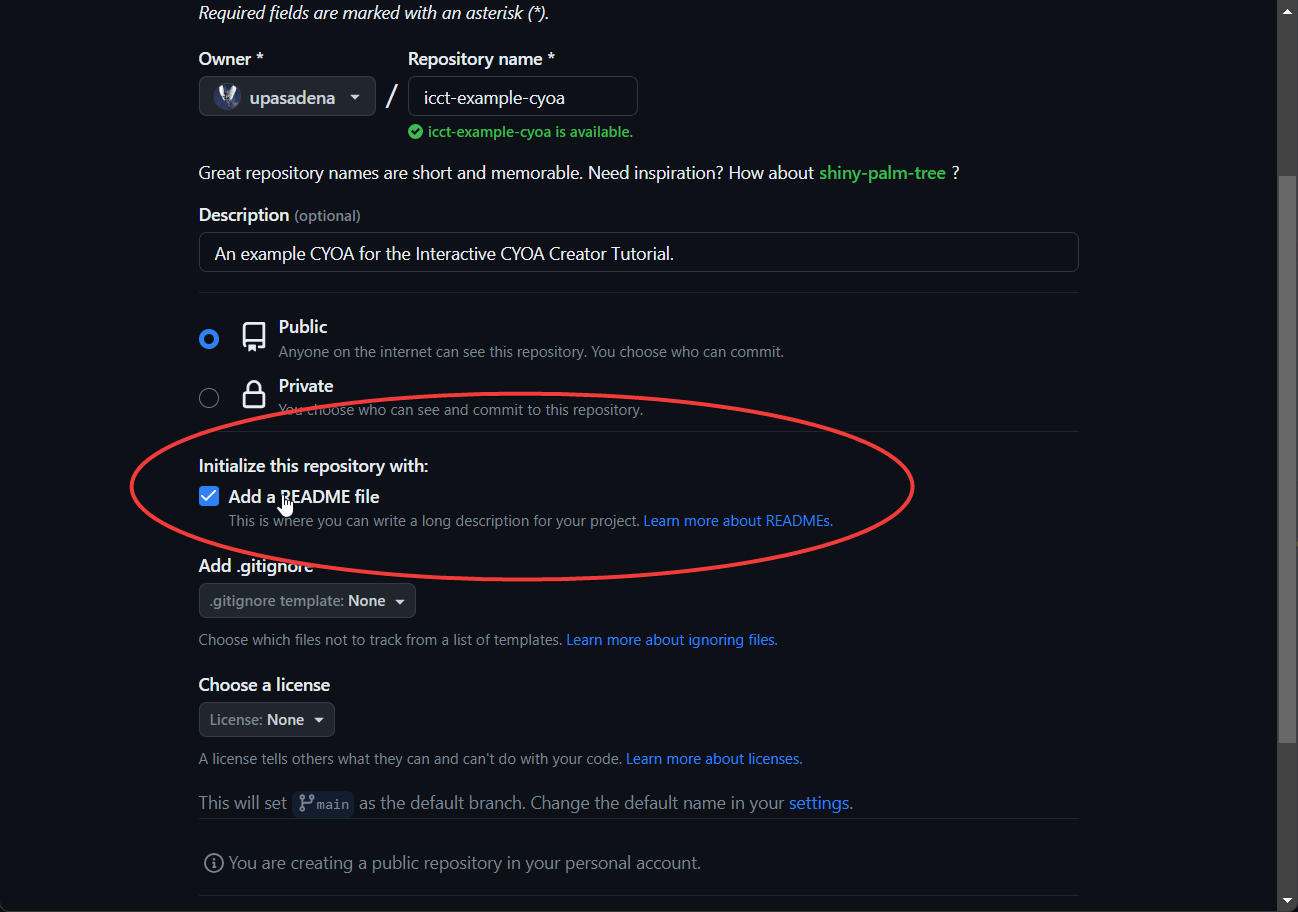
Initialize this repository with
This just adds useful files on creation of the repo.
Add a README file
A README file is a file that contains useful information about a directory and its contents therein. When viewing a repository's code, a README.md (the md meaning Markdown, the markup language that this tutorial is written in) is prettily displayed at the bottom.
I recommend checking this option if you haven't already created a local git repository, as it allows you to give information on the CYOA.
As an example, here is what the README.md of this tutorial looks like:

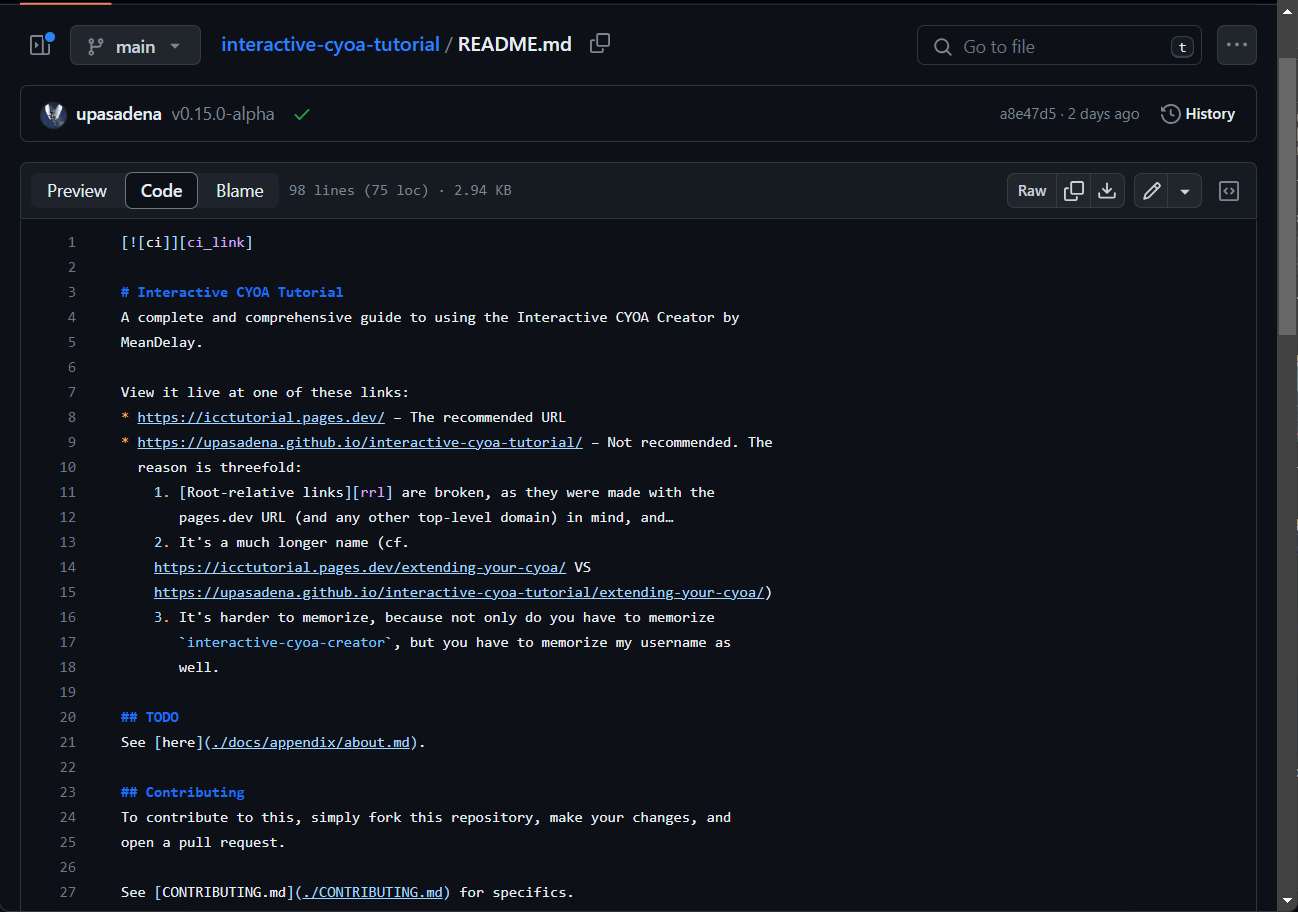
Learn more about READMEs from GitHub here.
Learn Markdown in a matter of minutes here.
Info
Fun fact, if you know how to bold and italicize text in Discord, you already know a flavour of Markdown.
Info
You can view the Markdown source for this page (and all pages in this tutorial) by going back to the top and pressing the page icon with the eye:
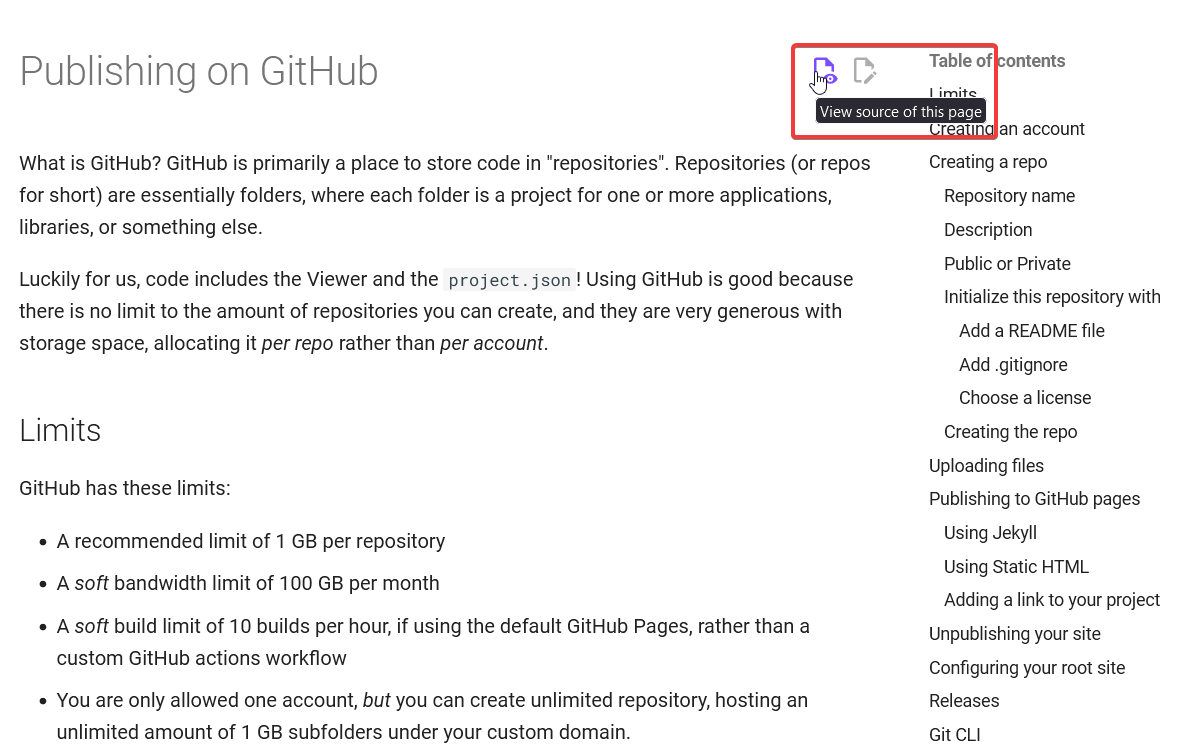
Which will take you to this:

You can also press the edit button in order to edit, but it's not likely you have write permissions to the repository, so you will have to fork (essentially copy) the repository, make your changes, and do a pull request (requesting that your code is merged back into the main repository).
Add .gitignore
You can, heh, ignore this. We won't need a .gitignore for the purposes of this tutorial, so just leave it at None.
What is a .gitignore used for?
Some programming languages and tools, when building applications leave residual files and folders laying about, and people may have database passwords and API keys and secrets in files.
A .gitignore file is used to ignore uploading them so that the developers don't accidentally leak their information or upload files that aren't necessary to running the application.
Danger
A .gitignore is only used when using Git CLI. If you upload files from the web, you can upload unwanted files.
Choose a license
As GitHub says,
A license tells others what they can and can't do with your code.
If you wanted to control how others use your project.json (because no one but MeanDelay has the rights to the Viewer), you can do so using a Licence here.

A couple of common licences include:
For source code (such as the README.md and project.json):
- MIT – You can do anything with it but you have to credit me (by including the licence), and I am not responsible for what you do with it
- AGPLv3 – You can do anything with it but:
- You have to make it open-source (such as uploading it publicly on GitHub) if you're distributing it
- You have to include this licence, including copyright notices
- Serving this over the internet counts as distribution
- You have to use this licence too
- You have to state your changes
- I am not responsible for what you do with it
For content (such as for making a static CYOA or original content inside of the project.json):
- CC BY – You can do anything, but you must credit me
- CC BY-SA – You can do anything, but:
- You must credit me, and
- You must use this licence for any derivative works
- CC BY-NC – You can do anything, but:
- You must credit me, and
- You cannot use the material commercially
- CC0 – This work is dedicated to the public domain, you can do anything with it!
- An equivalent for source code is The Unlicense.
Info
Fun fact, the AGPLv3 is the licence that this tutorial is using for its source code. For its content, it is licensed under CC0, a dedication to the public domain!
Learn about more licences here.
Overall, this only matters if you expect others may want to create derivative CYOAs (such as how Lt Ouroumov's Worm CYOA V6 is a fork of PixelGMS's original).
Additionally, it's a bit of a legal grey area considering you could potentially be hosting copyrighted content such as images and text (if you're adapting someone else's CYOA). To play it safe, you can:
- Attribute images to their authors (asking for permission may not be tenable if the project is large enough or if the authors don't respond)
- Ask for permission from whoever made the original static, and
- Write in your
README.mdthat you are only licensing the unique content in theproject.json, such as the Mechanics, Styling, etc
Creating the repo
To actually create the repo now, press the Create repository button.

You should now have made a repository!

Uploading files
To upload files is easy, simply press the Add file dropdown menu, and select Upload files.

Note
You cannot upload empty directories, you must have a file inside of them.
To upload your site, simply upload the Viewer files and your project.json!
Tip
Try dragging and dropping rather than choosing your files. I've had problems with uploading folders using that method.
Publishing to GitHub pages
Now that your site is uploaded, it's time to publish it for the world to see!
There are two methods we will be using in this tutorial: Jekyll and Static HTML. There are pros and cons to both:
| Method | Pros | Cons | Use case |
|---|---|---|---|
| Jekyll | + Allows using Markdown (.md) files + Jekyll themes + Easy | - Slower to deploy - Can be bloat if you don't need it | If you want to host information alongside CYOAs, such as Changelogs or a Version select, or if you have multiple CYOAs |
| Static HTML | + Faster to deploy and lightweight | - To display information you will need to use HTML and CSS - Needs to be set up | If you want to simply host CYOAs and that's it |
Using Jekyll
This is the default action that GitHub uses, and it's very easy to set up.
Simply go into Settings → Code and Automation/Pages → Branch → Change None to main → Save.
This will start the build process.

Going back to your repository you should see an orange icon, this indicates that GitHub Actions is working in the background to publish the site.
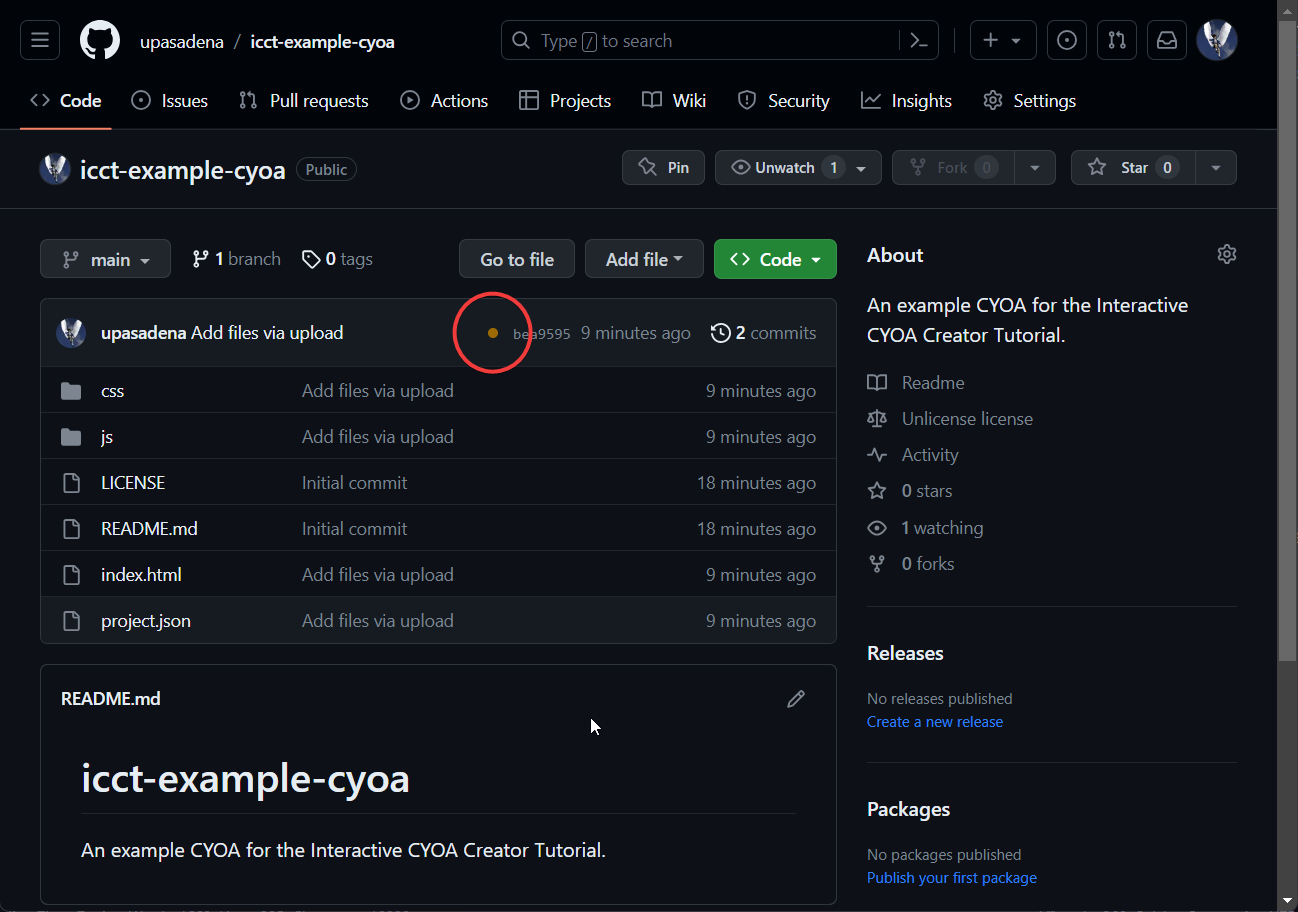
Pressing on that icon gives you an overview of its status:
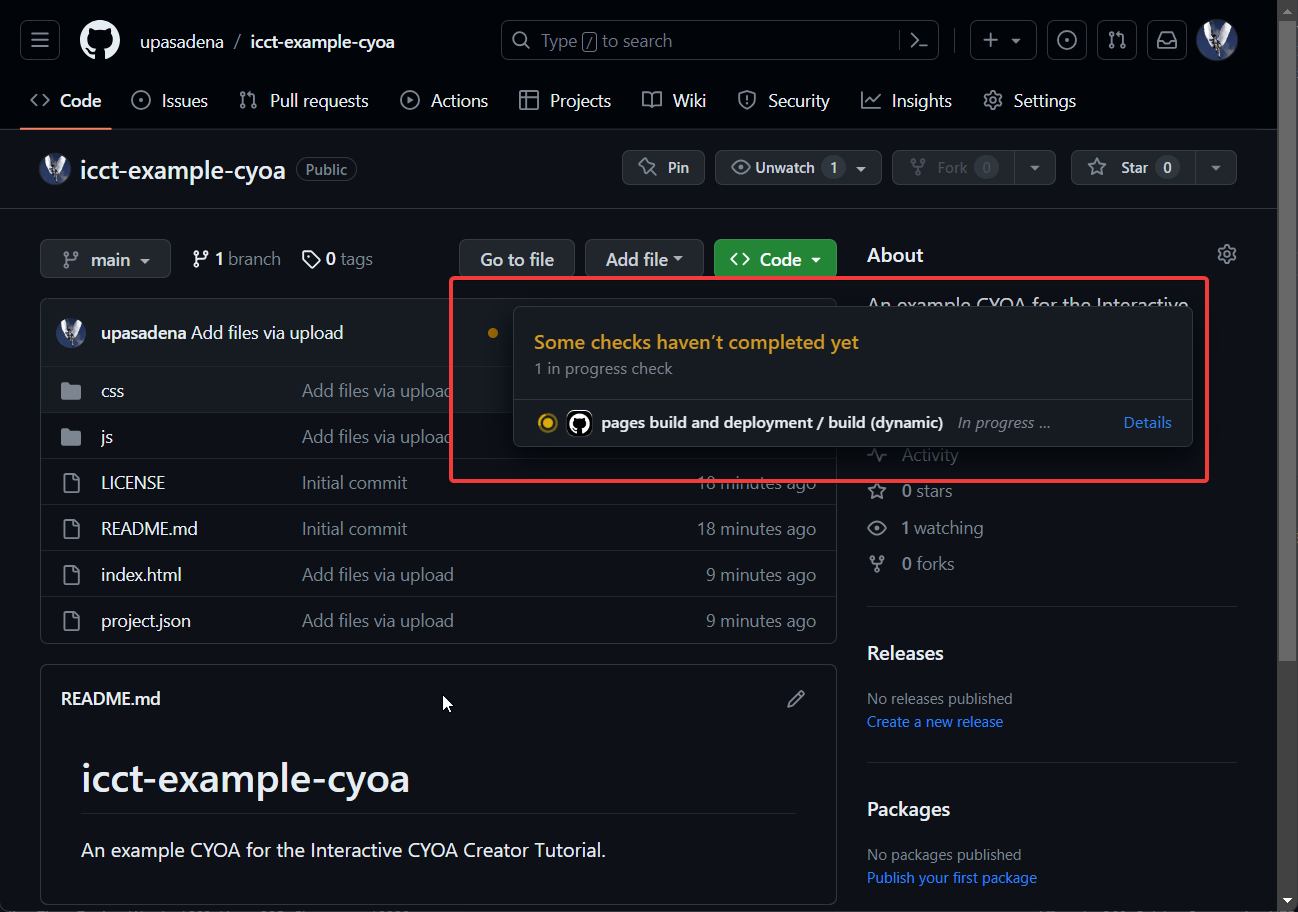
And pressing details should give you even more details:

After some time, it will complete:
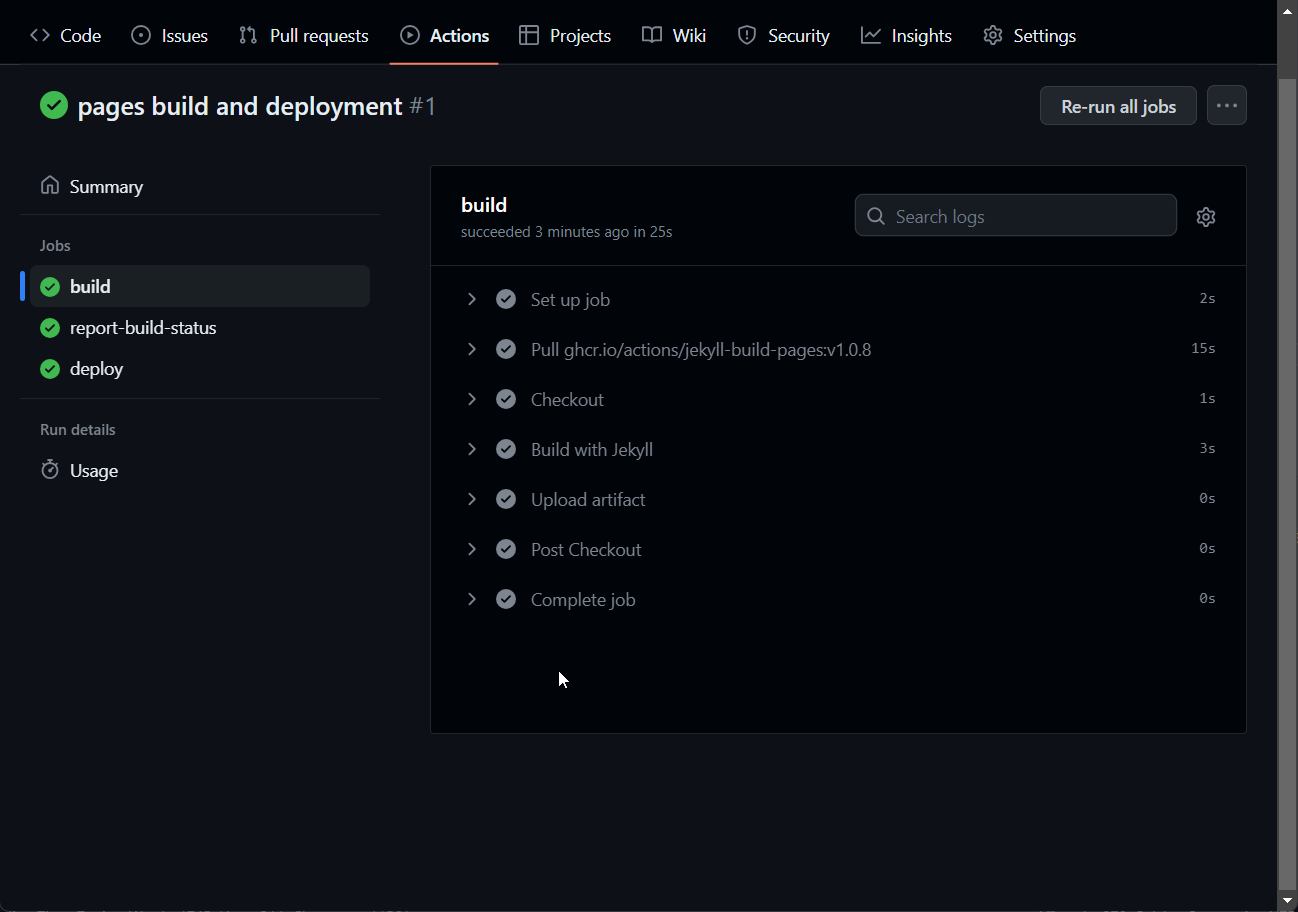
You should be able to access your CYOA at https://your-user-name.github.io/your-repo-name/ now!
You can repeat this with each and every CYOA you've made, and they will all be available under the subfolders of your special custom domain!
This example will always be available at https://upasadena.github.io/icct-example-cyoa/.
If you want a quick way to get your link, see Adding a link to your project down below.
Using Static HTML
If you didn't want to use Jekyll and just wanted to serve the files as-is, this is the option for you!
To start with, go into the Pages menu in the Settings. Select the Source dropdown menu and select GitHub Actions.
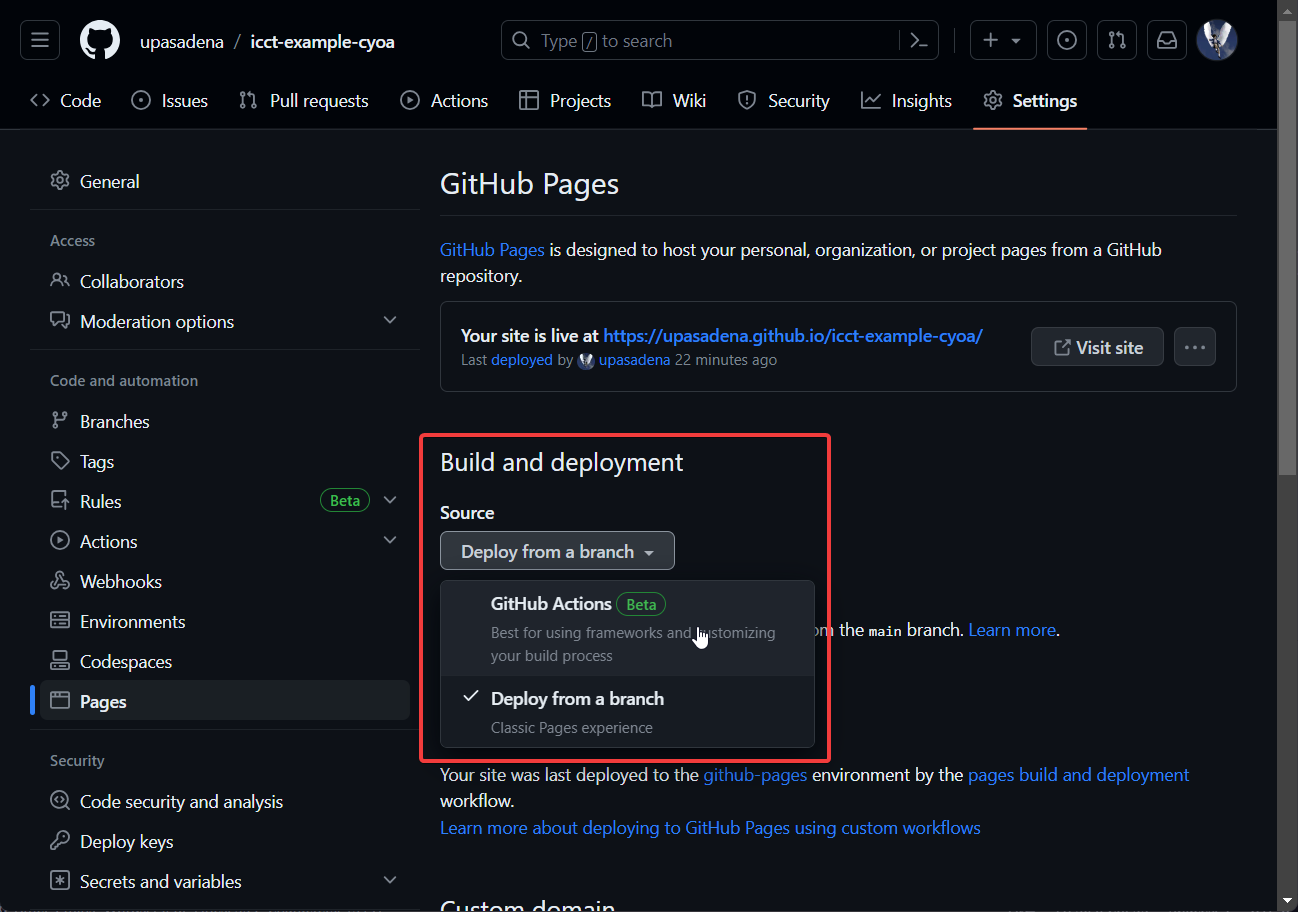
You should see two suggestions workflows now. Select Configure under Static HTML:

Then save the file by committing your changes (green button up at the top right).
Note
If it's not there:
- Copy and paste the code from /static/static.yml.
- Then, put it in a file under
.github/workflows/static.yml. - You can do this straight from the browser by selecting Add file → Create new file from your repository root. Where it says to name your file up the top, pressing slashes will create folders for you if they don't exist, so simply copy and paste the above path and file.
- Save the file by committing your changes (green button up at the top right).
You should notice it is rebuilding now, and you have a new .github folder:

As you can see here, there is a performance difference, even for such a small repository, so you can be rest assured if you have a massive one, then swapping over to Static HTML will improve the deployment times. This is useful if you want to send out updates to your audience quickly.

Why does Jekyll take longer?
This is because Jekyll is an external framework that takes in Markdown files and outputs them to HTML. So GitHub Actions has to not only download and install Jekyll AND your Git repository, but it must then convert any Markdown files to HTML.
Whereas Static HTML simply just uploads your files to a web server, and serves them as-is, making the progress significantly faster.
Adding a link to your project
If you want to quickly get the link to your site and have it ready to press in your repo, you'll want to do this. This is especially useful for newcomers who may want to preview your site, but don't have the time to host it themselves.
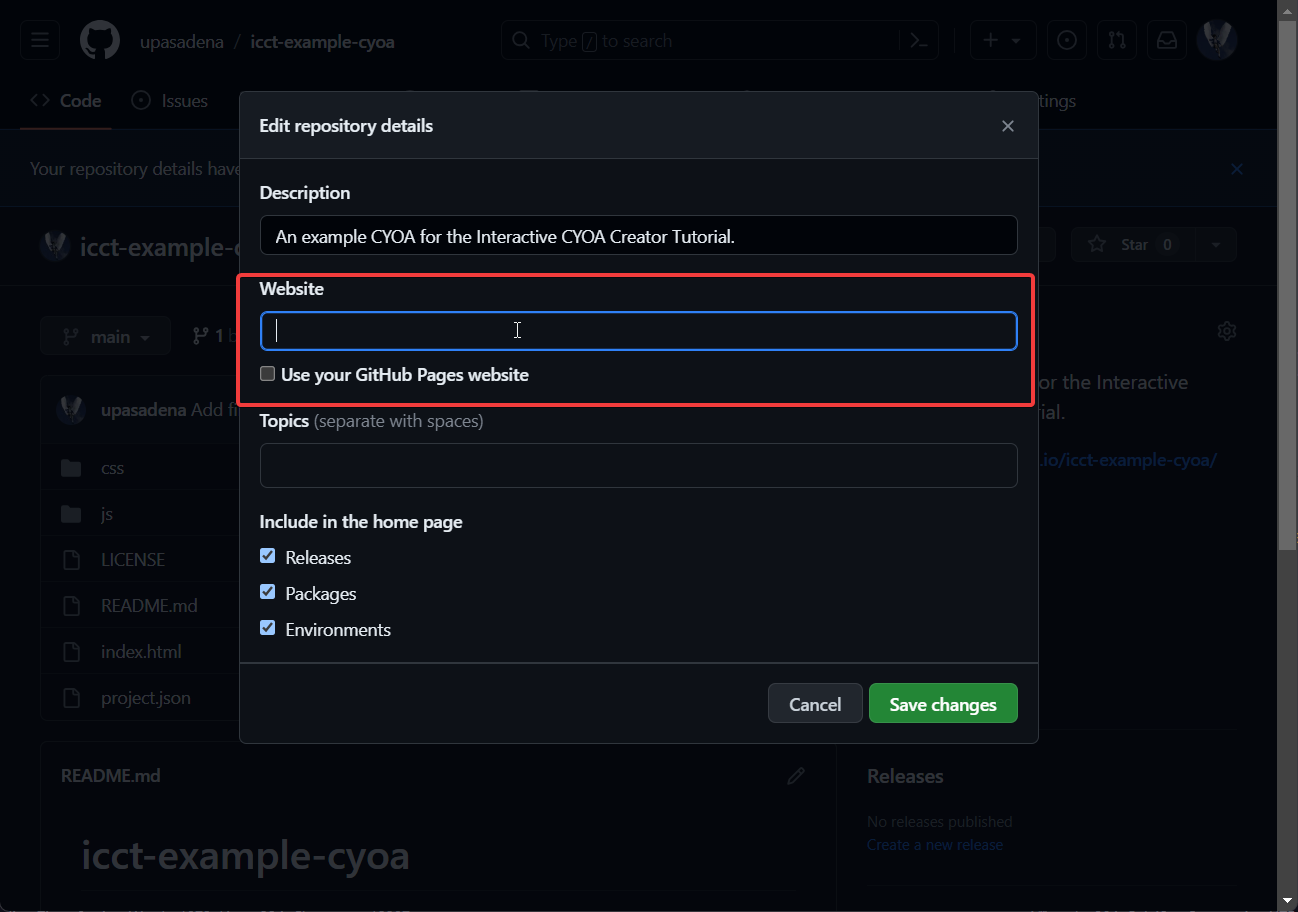
Simply press the settings icon in the top right (but NOT the settings tab, a bit below that, to the right of About) → and tick Use your GitHub Pages website.
You can also manually input a website in the Website input field if you were hosting elsewhere.
Example

Unpublishing your site
If you ever need to take down the site for some reason, it's simple!
Navigate to Pages in the settings, press the three buttons where it says your site is live, and press Unpublish site.

But your repo is still accessible to the public. You can either:
- Make it private
- Delete it, or
- Do nothing, I just want to unpublish the site only
Configuring your root site
If you wanted to configure the very root of your site (Such as https://yourname.github.io/) then it's simple. Just create a repository called yourname.github.io, and activate Pages for that.
Learn more about GitHub Pages here
Releases
Releases are, you guessed it, releases. Specifically, they snapshot a version of your project that then becomes immutable, meaning you cannot change it.
They are significant because they allow you to go back to an earlier point at view what it was like then, and, because Releases automatically create tags, you can compare using git diff the difference between the two releases: what changed, what was deleted, and what was added.
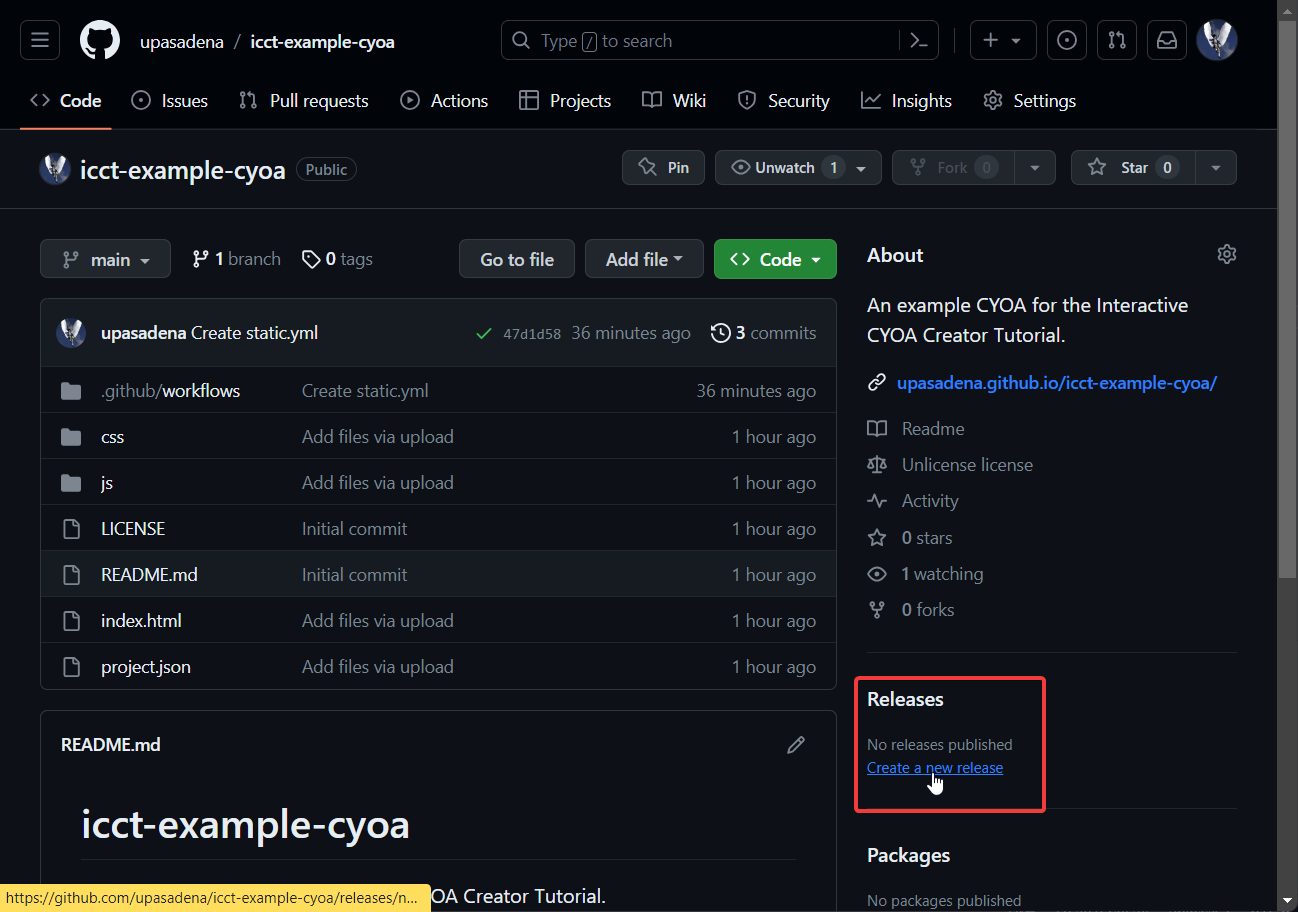
You can create "releases" by pressing Create new release in the bottom right, under the Releases header.
Git CLI
Note
This topic is for more intermediate to advanced users. It may not be necessary for your use case.
This section assumes basic familiarity with commands like mkdir and cd.
This is not the best tutorial on Git out there, and won't be covering it in much detail, just enough to do basic stuff like cloning and uploading.
Git is an incredibly tool that is vast and complex. As such, it is simply untenable to go through each and every aspect of it. Instead, we will go through the very basics in order to get you up and running.
Note
Git is where GitHub gets its name, because it's a hub for Git repositories.
To begin, download the tool from here (if you're on Windows or Mac; if you're on Linux install using your package manager).
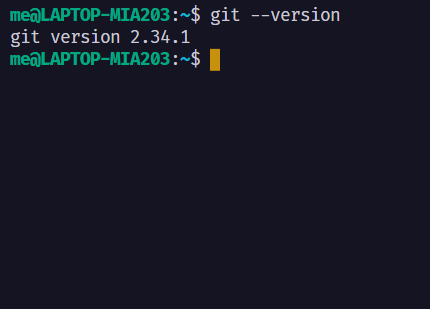
After installing, make sure it is in your path by running (in Windows, this can be Powershell or Command Prompt, which you can open by searching for it, or by pressing Win + R then typing cmd or pwsh. If you're on Linux you already know what terminal emulator you're using.):
| Bash | |
|---|---|
where it should display like so:
Initializing a repository
Note
Use this only if you haven't created a GitHub repository and selected an option under "Initialize this repository with".
Use the command in the folder you want to initialize:
| Bash | |
|---|---|
or to initialize it outside of the folder:
| Bash | |
|---|---|
This display "Initialized empty Git repository" when completed:

And you may notice a hint here if this is your first time using Git. Git repositories can have many "branches", which can be thought of as a branch of a tree. They can split off at any time (and thus are separate) but – unlike real trees, I assume – can also rejoin the original branch, merging them together.
The default branch that Git starts with is master. However, the default branch that GitHub uses is main. I recommend changing it to main:
| Bash | |
|---|---|
You may have noticed --global. There are two levels to Git config settings. There are the global settings, which are the default for each project you use, and repo-specific settings, which override the global ones. So an existing repo using master as the main branch will not be overridden by your default, and you can rest assured.
As it says, to rename your current branch use:
| Bash | |
|---|---|
Changing the config
Git needs a name and an email in order to commit. Set this up globally like so:
| Bash | |
|---|---|
Remove the global flag for repository-only settings. You can see the current values by simply not typing anything after user.name or user.email.
Tip
Set the name and email to your display name and email used by GitHub, respectively. This is because GitHub will display the account associated with the email's name and profile picture, and links to that account too.
Tracking files
To first do something with Git, you must have files.
Let's create a file right now:
Now let's track the status of our Git repository:
| Bash | |
|---|---|
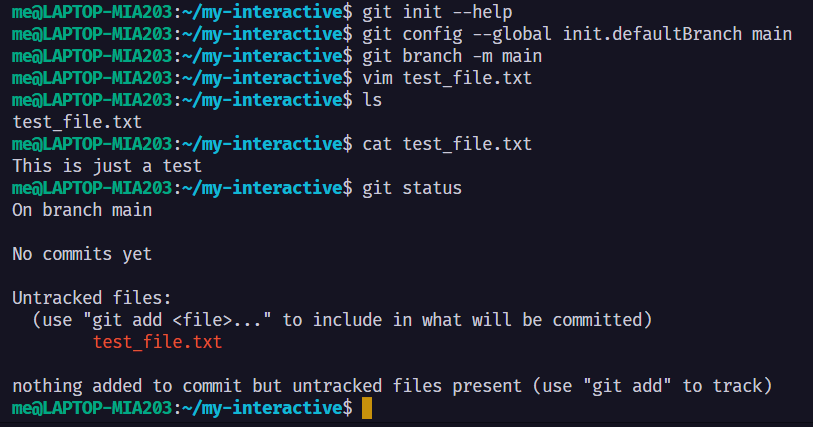
As you can see, it knows the file exists, but it is untracked. That means Git will ignore that file.
To individually add the file into the Git repository:
| Bash | |
|---|---|
To add all files in the current folder recursively, do:
| Bash | |
|---|---|
Now let's check the git status again:

Great! The changes made (a new file in the directory) are now ready to be committed.
But what if you want to exclude files from being included (especially useful if you're using git add .)? If you read the earlier sections, you know about the .gitignore file. Creating this and setting rules allows you to ignore files and folders according to patterns. Here are some basic patterns:
See more information at this cheat sheet here.
Making a commit
A "commit" is essentially a mini-release. It is you stating that all changes to the repository have been finished, and to officially register all the cumulative changes in the Git repository. Commits only affect tracked files.
To make a commit you must use the git commit command:
| Bash | |
|---|---|
The -m flag (short for message) is where you put information about what you changed. GitHub has the message of the very first commit be Initial commit, and has changes to files by default be Update <file name>. The important thing is to be consistent with this.
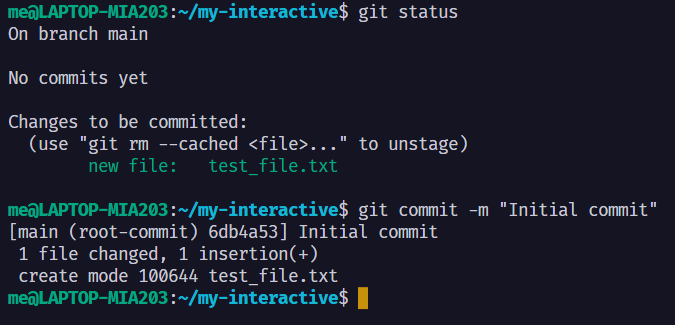
And you just made your first commit!
Viewing the log
You may wish to view the commit history at one point.
To do so, simply type:
| Bash | |
|---|---|
And it will display lots of information:
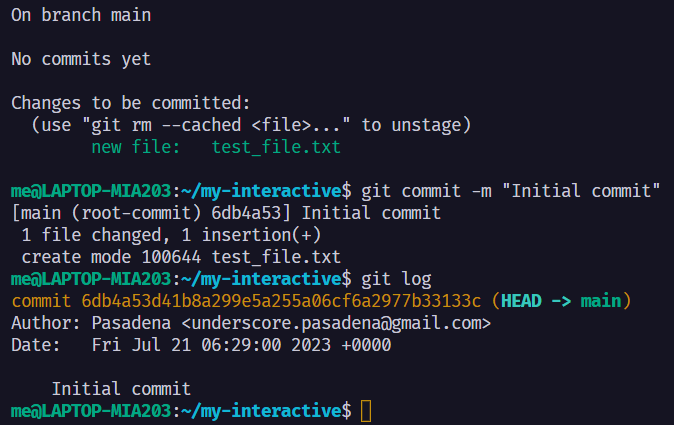
For now, it's pretty sparse. But come more commits you'll be able to see more and more.
To view it in a more compact manner, simply type:
| Bash | |
|---|---|
to get this:

Downloading a repository
Whether you're downloading someone else's repo or your own, the process is the same.
Simply use the clone subcommand:
| Bash | |
|---|---|
For example, this will clone the repository of this tutorial (warning: this tutorial is 324 MB as of v0.15.0):
| Bash | |
|---|---|
which will look like this when done:
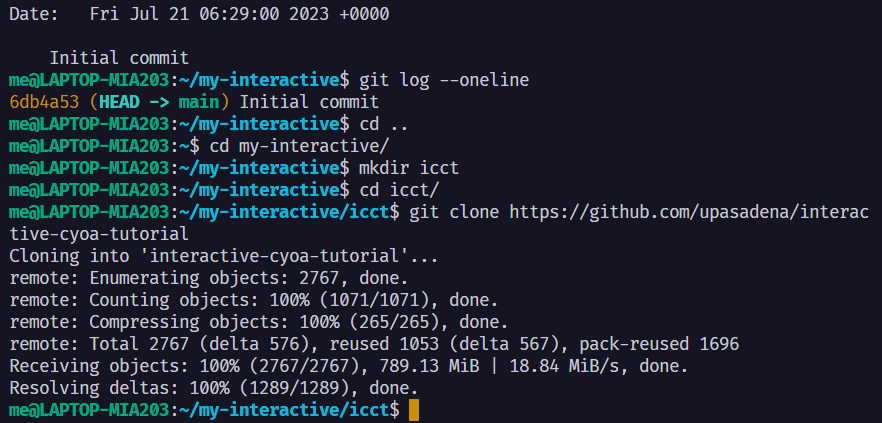
Using Git clone is important, because it preserves the Git repository. Other methods of downloading may only download the files themselves, rather than with the Git repository.
Uploading to GitHub
Now, we'll be assuming that the repository we're uploading to hasn't been initialized yet, and so is empty. If it already has been initialized, clone it, make your changes, commit, then jump to #pushing.
Setting up the remote
In order to upload your files to the cloud, Git must first know where it resides. To that end, use the git remote add command:
| Bash | |
|---|---|
git-cli-tut on GitHub, I added it like so: | Bash | |
|---|---|

Now Git knows where to upload your files!
What does origin mean?
origin is just a name for the remote URL that we can reference in other commands. It can be named anything, but most repositories have origin set to the default remote name.
Pushing
To push (upload to the remote), make sure you have at least one commit. Then, do this command:
| Bash | |
|---|---|
Info
You only need to add -u origin main if this is your first push to an empty repository! It tells Git that the default remote it should send to is origin, and to use the main branch for pushing.
So after your first push, you can just use:
| Bash | |
|---|---|
However, when it asks for your password, do not put in your GitHub password. This is because GitHub fazed out passwords in 2021. Instead, you have to create a personal access token, which is available here.
Pushing with the username and access token looks like so (note that the token being pasted in is not invisible):
Now your repository should change from an empty one:
![]()
Into a full one:
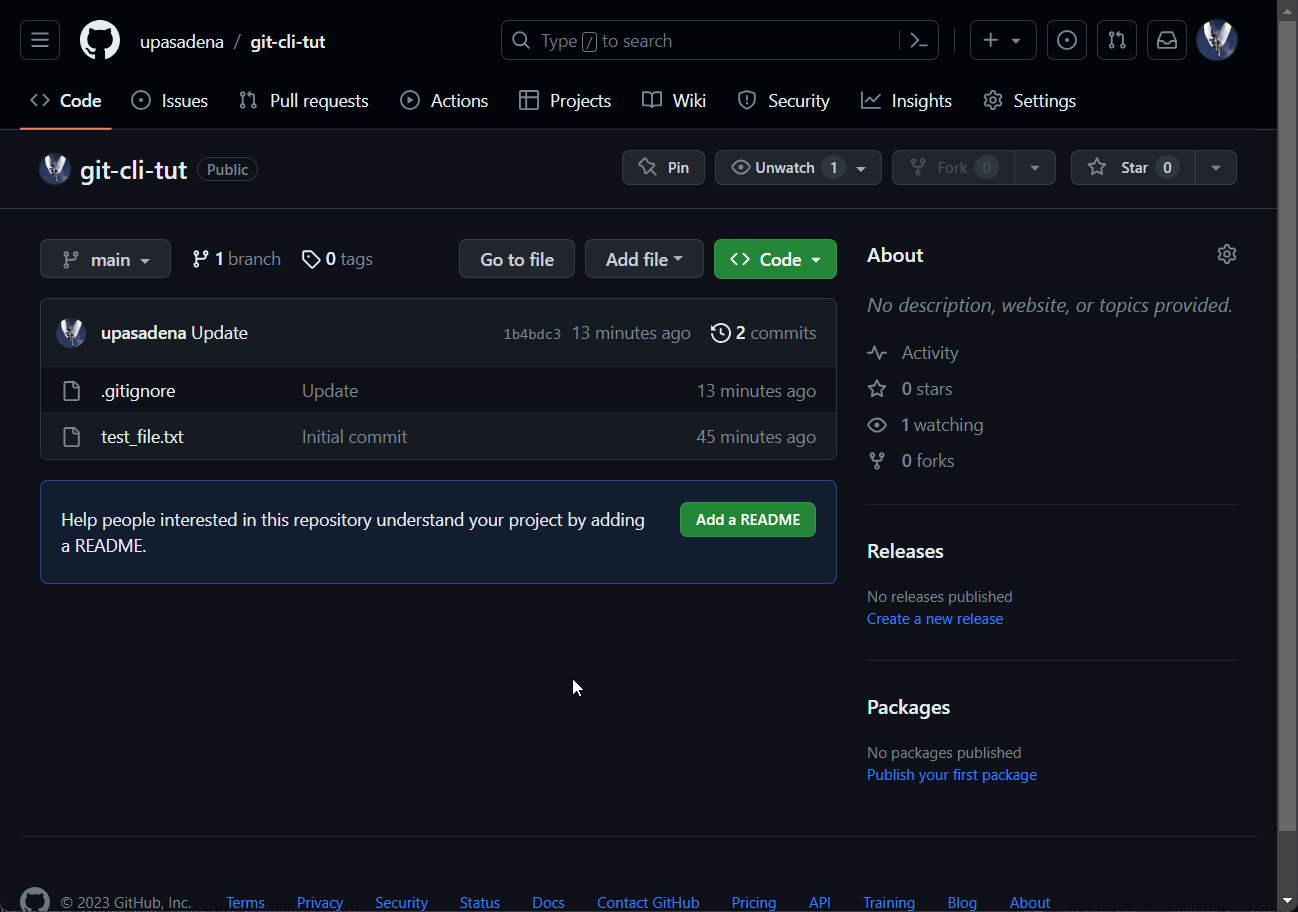
Note the lack of a README.md makes it look bare.
Reverting changes
Made an irreversible mistake? Don't worry, Git can help (so long as you committed every so often).
First, you need to get the commit ID you wish to revert to, it usually being the last one, so use git log.
Note
Both the IDs from git log and git log --oneline work, but oneline is shorter and easier to type if you don't have a mouse to help copy and paste.
| Bash | |
|---|---|
To revert to the last commit, simply put in the ID of the commit that you want to revert to with the format git reset <ID>:
Note
Use reset not revert
As we can see, we reversed the commit. However, we did not reverse the changes we made, only the fact that a commit happened. In order to that, we attach the --hard flag to the command:
| Bash | |
|---|---|
Which, as we can see, removes the file:
| Bash | |
|---|---|
Putting it all together
After making changes it should look like this:
Example
And you're all set! You should now know the basics of GitHub and Git, and how to use them to host your CYOAs!